Squirrly SEO Live Assistant
The Squirrly SEO Live Assistant is your GPS for achieving perfect on-page SEO for every article or page you Publish. Get higher rankings for keywords connected to your brand and services, and outrank your competition.
We built the SEO Live Assistant so that you no longer have to rely on guesswork to ensure you have 100% SEO on your blog posts, product pages, and landing pages.
The SEO Live Assistant analyzes your content in real-time by looking at the topic you’re writing about and gives you the coordinates for perfect on-page SEO by providing you with as-you-type advice, right inside your WordPress Dashboard.
This saves you a lot of time when it comes to content creation and helps with quality assurance as well.
▶️ Feature walk-though
The SEO Live Assistant makes sure that:
- Your article is long enough to keep readers on your page/article.
- You have a strong introduction for your article, in which you specify the topic you’re writing about.
- You don’t use any excessive and annoying repetitions in your writing.
- You avoid keyword stuffing.
- You don’t over or under optimize your article.
The Squirrly SEO Live Assistant gives you real-time SEO tips while you are typing so you can fully optimize your text right then and there. Write with both your audience and search engines in mind. It’s easy to do when you have the Live Assistant guiding your steps.
The SEO Live Assistant is easy and fun to use thanks to the built-in gamification elements that make you feel like a champion every time you do something right, and a section in the Assistant turns Green.
When all the boxes check green, your article is fully optimized and ready to be Published.

What the assistant focuses on are the most important ranking factors for amazing on-page SEO. In fact, it takes care of all on-page SEO fundamentals for you and checks that:
- the keyword is in the title of the page and in one of the headlines
- the exact keyword is mentioned in the introduction and across your content
- there’s no keyword stuffing or annoying repetitions
- the keyword is used in the alt tag of your images
- the keyword is used in the meta description
- you have at least one image on your page
- and more.
So, by simply using the Squirrly Live Assistant every time you create an article or page, you’re already scoring massive SEO wins that Google rewards with the top positions in SERPs.
[RELATED] Understanding Squirrly’s Live Assistant: How it Helps You Do On-Page SEO like a PRO >>
Re-optimize Existing Pages
You can also re-optimize existing pages on your site using the SEO Live Assistant.
Go to Edit Post for the post you want to optimize. Add your keyword in the dedicated section from the SEO Live Assistant (Step 1 – Keywords).
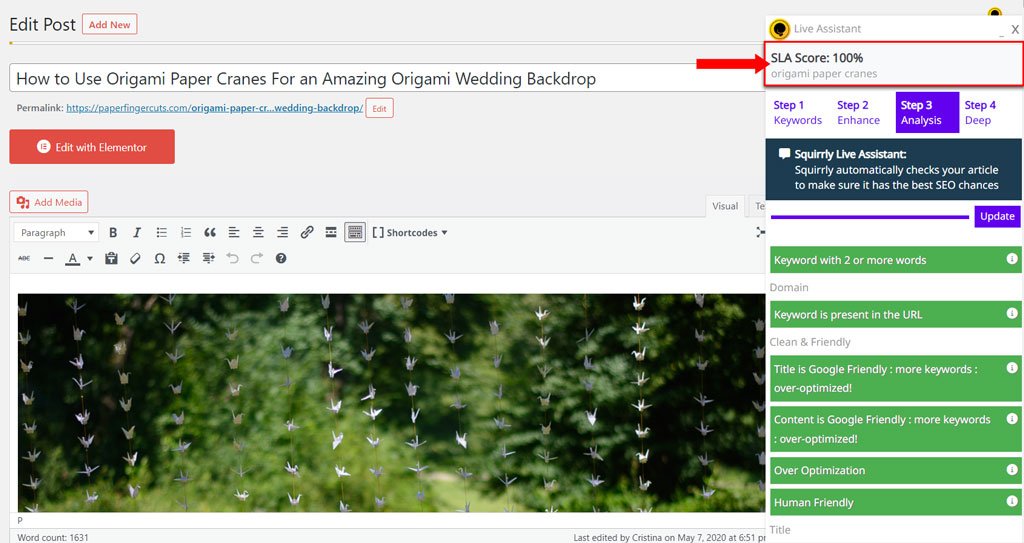
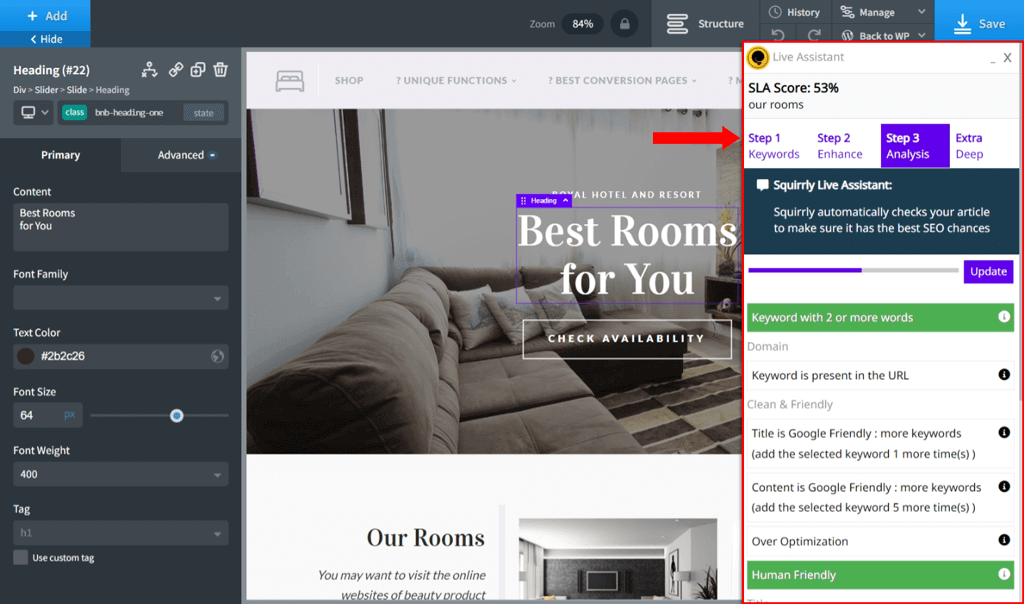
Once you’ve selected the keyword you want to use, click on: Step 3 – Analysis (as shown in the screenshot below)
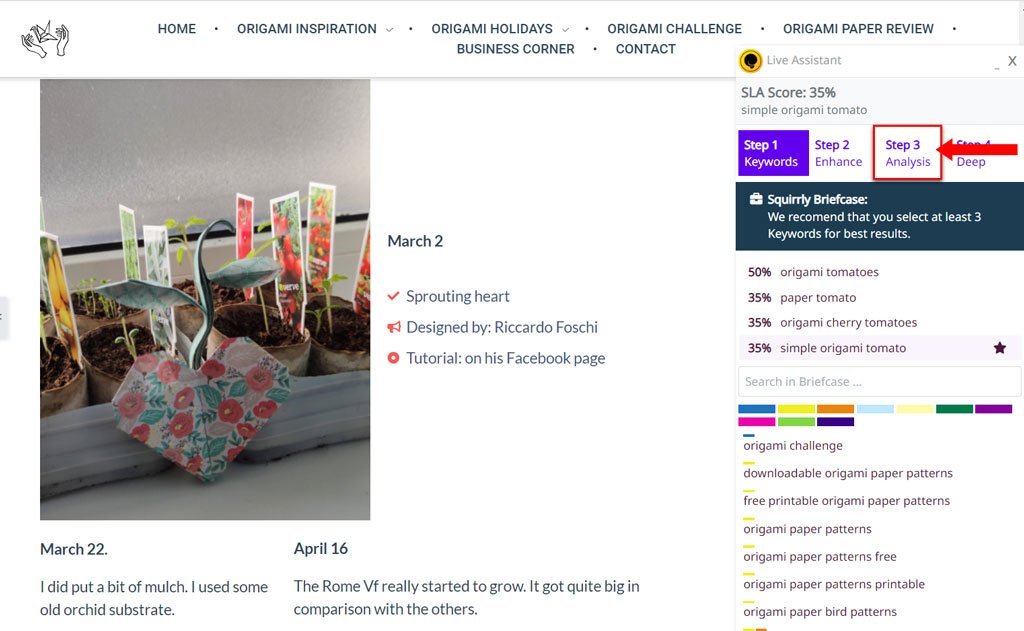
Once you do this, the Assistant will show you:
- the current optimization level for that keyword;
- what you need to do in order to reach 100% optimization level.
Live Assistant Box
By default, the Squirrly SEO Live Assistant will show on every post type while you’re in Post Editor in backend.
The Live Assistant will load on the right side of the screen as a floating box and you can move it from right to the left as you like. (simply click on the Assistant, Hold, and Drag it anywhere you want)
You can also close down and re-open the SEO Live Assistant anytime you want in the User Interface.

If you are in the Post Editor and Squirrly Live Assistant is NOT loading as it should, please read this Help article.
Add Keyword in the SEO Live Assistant
Before using the Live Assistant to optimize a post/page, you need to:
- make sure you found the best keywords that will help you rank in the TOP 10 of Google;
- save those keywords to Squirrly Briefcase.
^^ For this, you need to use the Keyword Research Tool from Squirrly > AI Research > Find Keywords.
Once you saved your keywords to Briefcase, adding a keyword from Squirrly Briefcase to the SEO Live Assistant is easy.
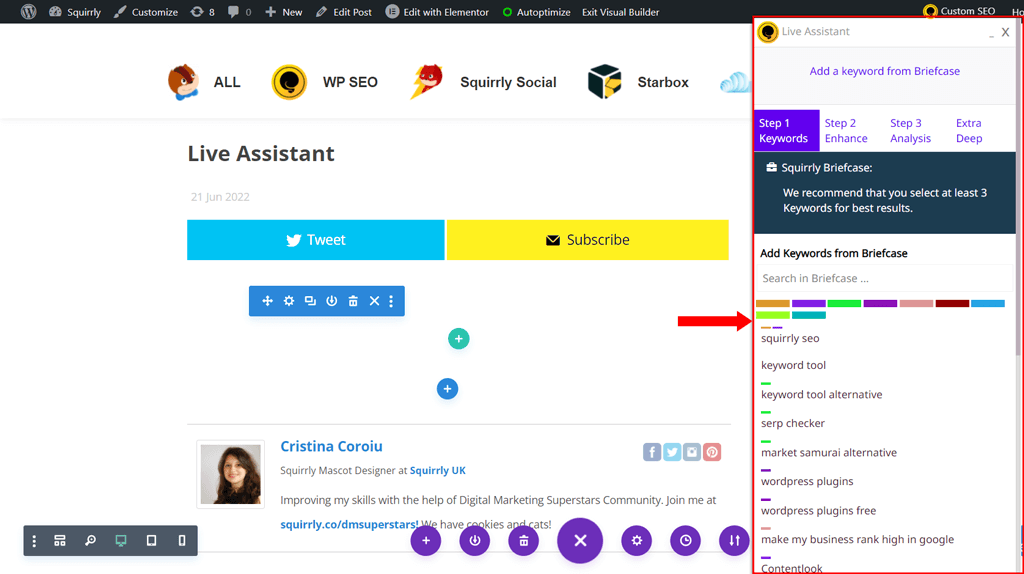
Click on Step 1: Keywords and search for the keywords you want to use in your article. You can use the search bar for this, or filter keywords based on their Briefcase Labels.
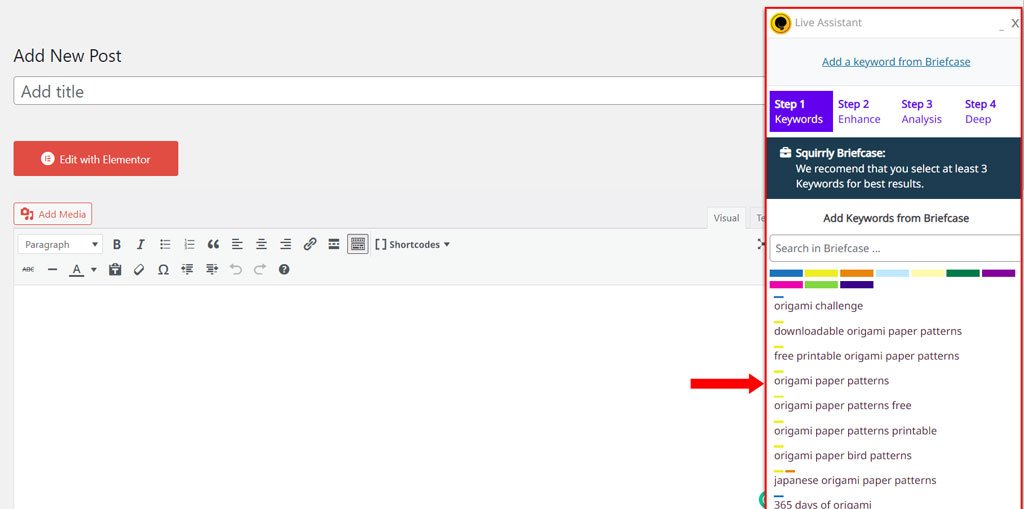
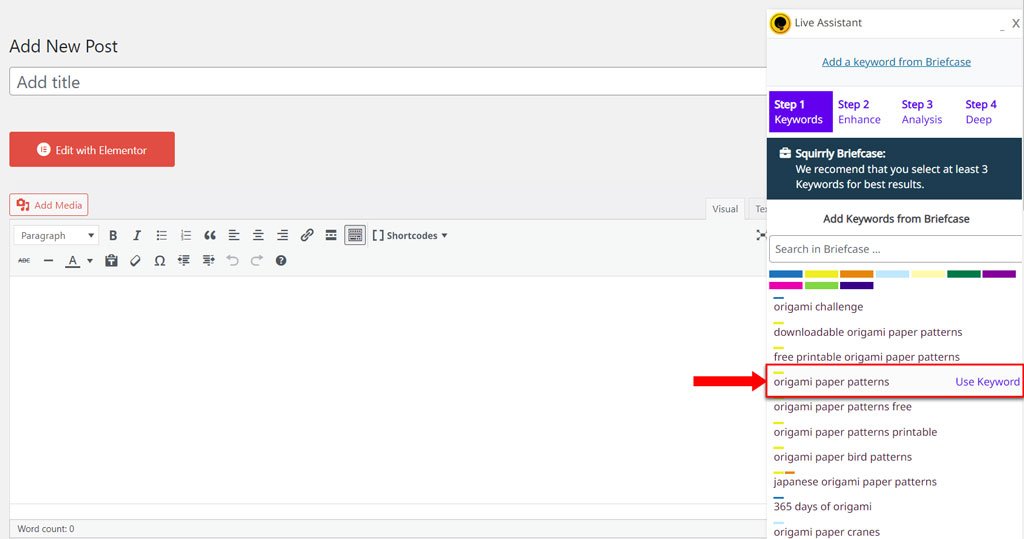
Once you found the keywords you want to use, add them one by one by clicking on Use Keyword.
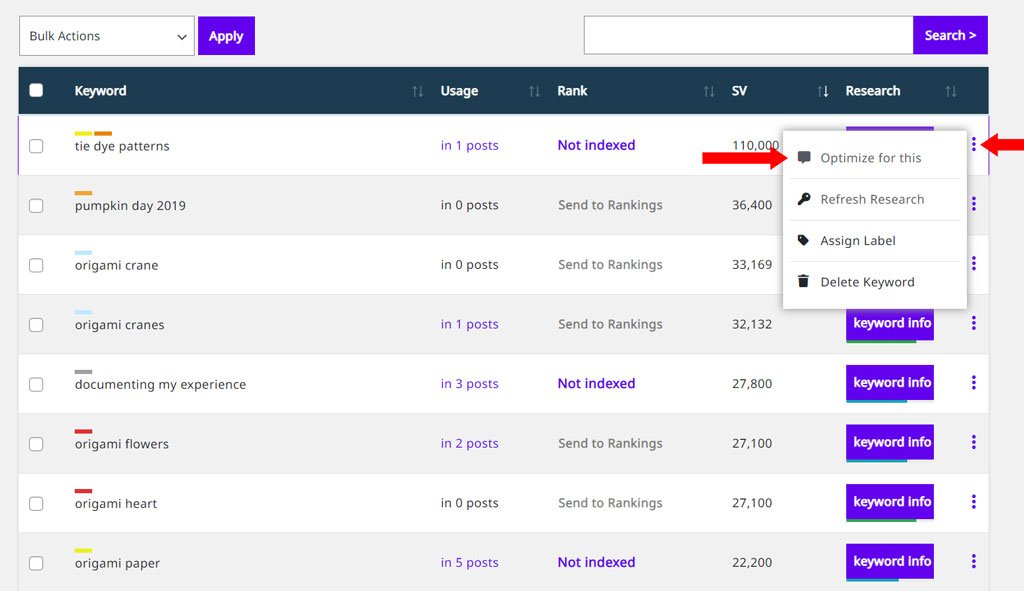
You can also select the main keyword you want to optimize for – straight from the Briefcase section of Squirrly SEO. (navigate to AI Research > Briefcase to reach it)
Go to Briefcase and click on the three dots that appear next to the keyword you want to optimize for. Click on Optimize for this. This will open a blank post with the keyword already added to the Live Assistant so that you can start creating your new post/page.
Multiple Keyword Optimization
With the SEO Live Assistant, you can optimize a page or article for multiple keywords. (in order to provide SEO Context to improve your Rank Brain ratings).
Optimizing for multiple keywords helps Google understand the exact topic and context of your page.
Day 5 from the 14 Days Journey to Better Rankings explains in more detail why and when it’s important to optimize for multiple keywords and provide SEO context.
To optimize a post for multiple keywords:
- Go to Edit Post;
- Click on Step 1: Keywords
- This will open the list with all the keywords you currently have in your Briefcase;
- From there, select the keyword you want to optimize for by clicking on Use Keyword;
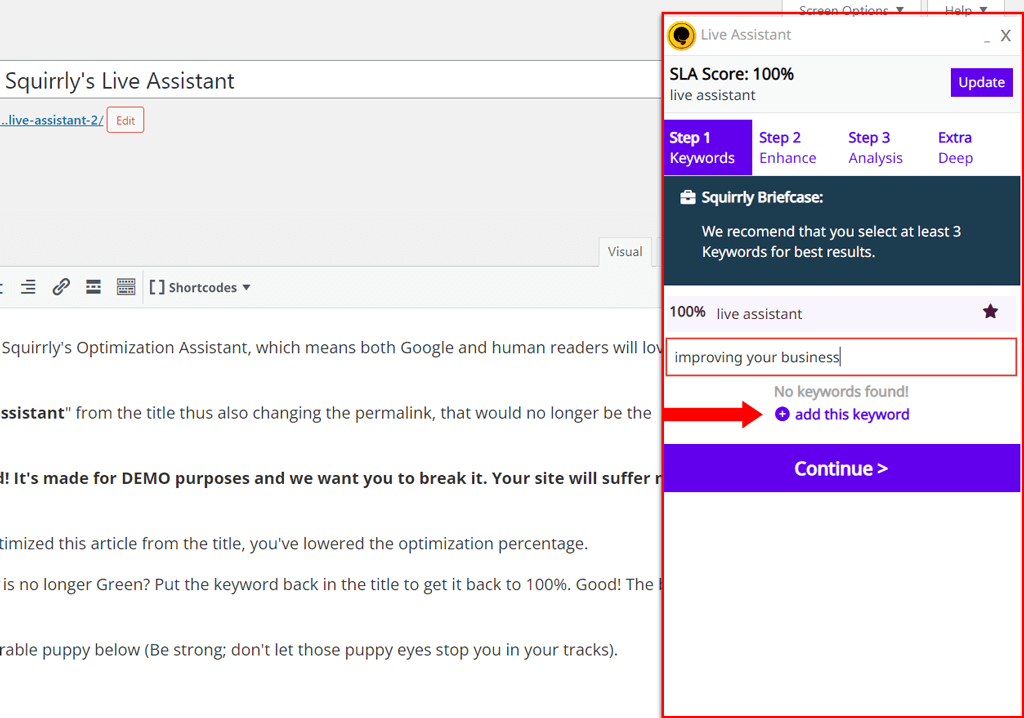
- (alternative) If you DON’T want to add your keywords to Briefcase first, you can also add the keyword you want to use in the search bar and then use the Add this keyword functionality

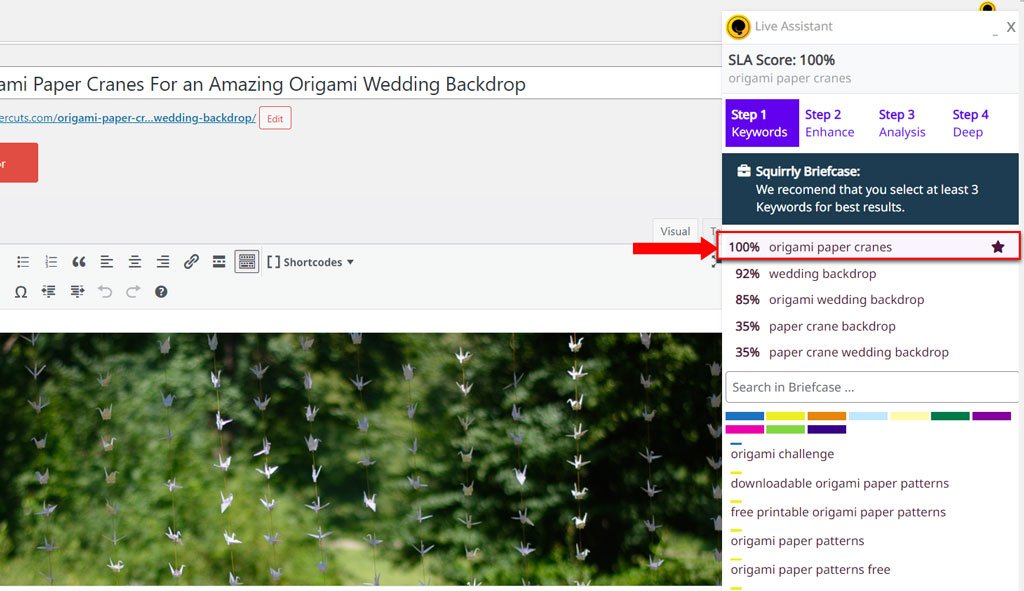
- Inside the Step 1: Keywords section, you will be able to see the optimization percentage for every keyword you’ve used (as shown in the example below)
- In Step 3: Analysis, analysis performed by the Live Assistant will change according to the last keyword you’ve clicked from Step 1: Keywords to help you better optimize your page for that keyword. This keyword will have a STAR symbol next to it.
! In order to optimize for multiple keywords using the Live Assistant, add those keywords to your Briefcase.
The reason for this is that it’s important to research all keywords before targeting them in your content- and NOT optimize blindly for a keyword without knowing anything about its search volume, competition, and so on. SEO strategy 101.
You can add as many secondary keywords to the SEO Live Assistant by using Briefcase. There is NO limit. You know how many you need or which you need help to remember mentioning in your content.
If you DON’T want to add your keywords to Briefcase first, you can also add the keyword you want to use in the search bar and then use the Add this keyword functionality (shown in the screenshot below)
Once you select the keywords you want to optimize for, the Assistant will automatically calculate optimization Scores for all secondary keywords and display them to you as you’re typing your content.
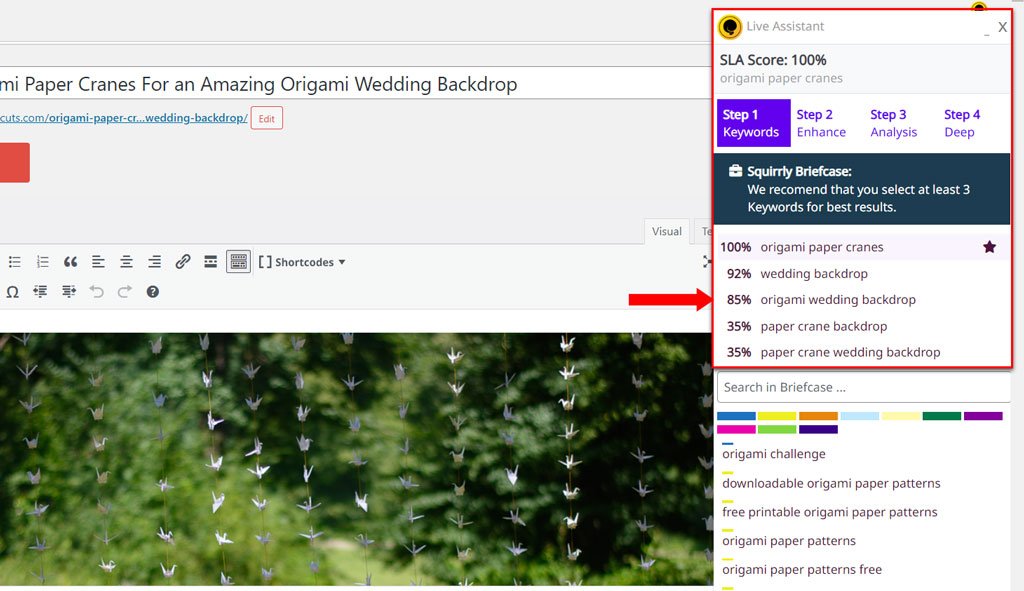
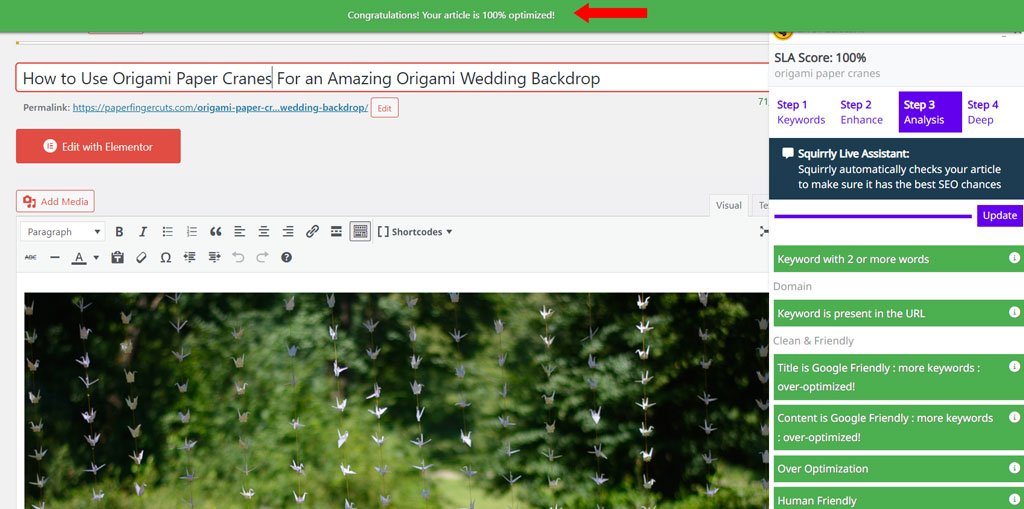
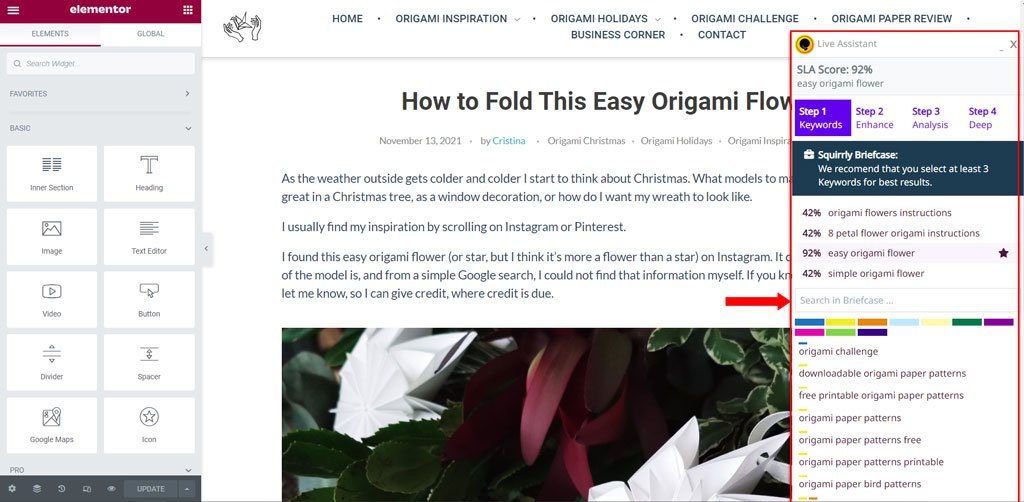
In the example below, the text is optimized 100% for the keyword origami paper cranes (which is the main keyword) and 92% for the keyword wedding backdrop (which is a secondary keyword). Clicking on each of those keywords will prompt the analysis performed by the Live Assistant to change.
So, if I were to click on origami paper cranes, I would see that all boxes from the Assistant are marked Green (because the text is already 100% optimized for that keyword).
However, if I were to click on wedding backdrop, I would see that there are still some actions I need to take in order to reach 100% optimization for my page.
Your selected keyword will always have a STAR symbol next to it (like in the example below). That’s how you know which keyword you’ve set as your main keyword.
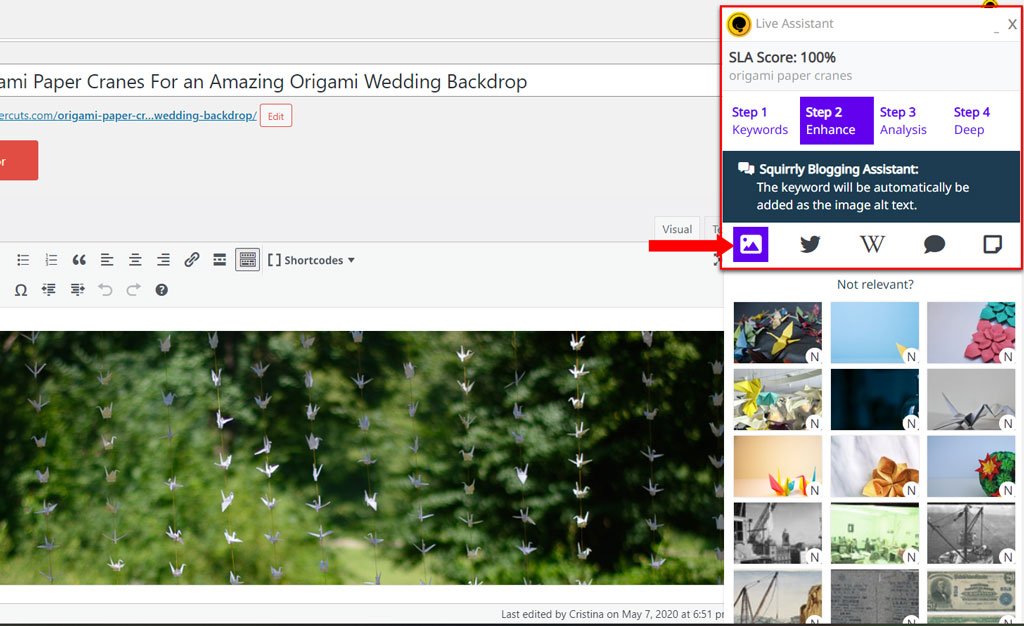
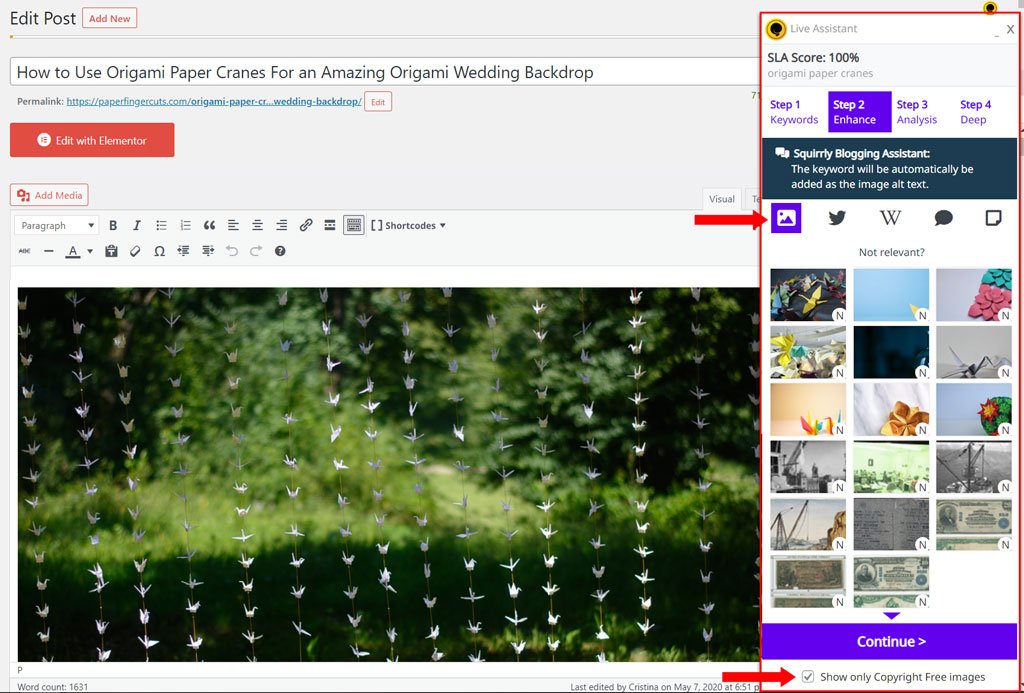
Once a Keyword is selected, you can further enhance your content by inserting copyright-free images, adding relevant Tweets & Wikis, and referencing related blog posts using Squirrly’s incorporated blogging tools.
Go to Step 2: Enhance to access them.
Everything you need to create awesome content that Google ranks and readers love – conveniently available in your WordPress post editor!

You can insert images in your article by simply clicking on the image that you want to add. You have to option to look for Google images or Copyright Free images. You can also search images by typing in other keywords (in case you didn’t get relevant options for images). Click on Not Relevant and the Search Bar will appear, as shown in the GIF below.
Keyword Present In the URL Check
One of the first things that the Live Assistant will check for is whether the keyword you are targeting is present in the post URL. Your URL helps Google and other search engines understand what your page is all about.
Having the keywords present in the post URL is an important signal that lets Google know that your page is relevant for a certain search query, and therefore it’s more likely to display it in search results for that query.
Starting with WordPress version 5, the permalink is created only when the post is saved as Draft. Save the post as a draft or public to activate the “Keyword is present in the URL” task in Squirrly Live Assistant.

Turn All Tasks Green
Turning all tasks Green for the selected keyword in Squirrly Live Assistant is not very hard.
Make sure you write the article to attract readers; you’ll want an article that is not only Google-friendly but also human-friendly. Turning all the tasks Green will ensure your article meets that criteria.
While writing the article, the Assistant will help you make sure that you:
- Use the keyword in one of your Headlines (H2-H6)
- Add one or more images in your article and use the selected keyword in one image as Alternative Text as well
- Bold the keyword
- Use synonyms of the keyword instead of just repeating the same keyword over and over again. You can add the synonyms in Squirrly Briefcase for multiple keyword optimization.
Bonus tip! Try to write articles that are longer than 1,000 words (even 2,000 words, if possible). This way, readers will spend more time on your page. Plus, by creating long-form content, you can optimize the post for more keywords without too much effort.
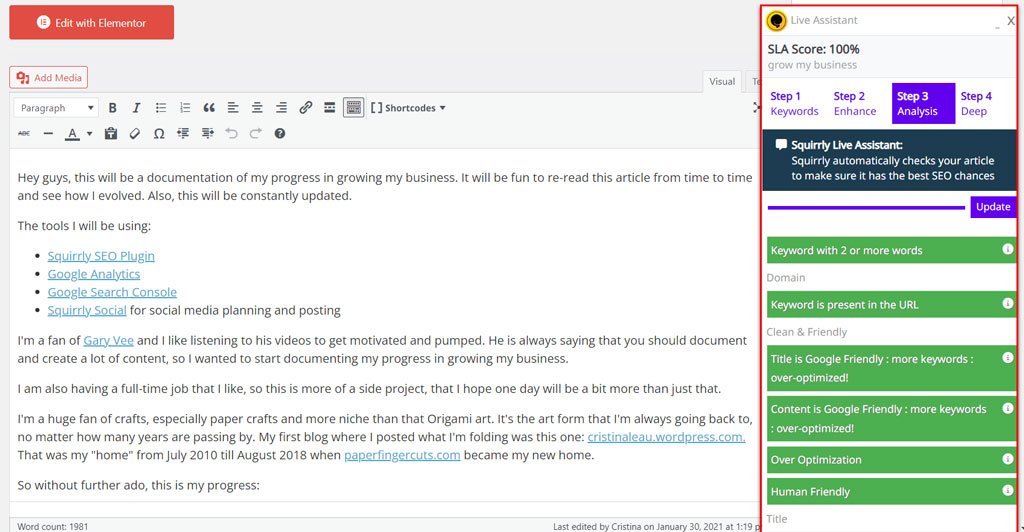
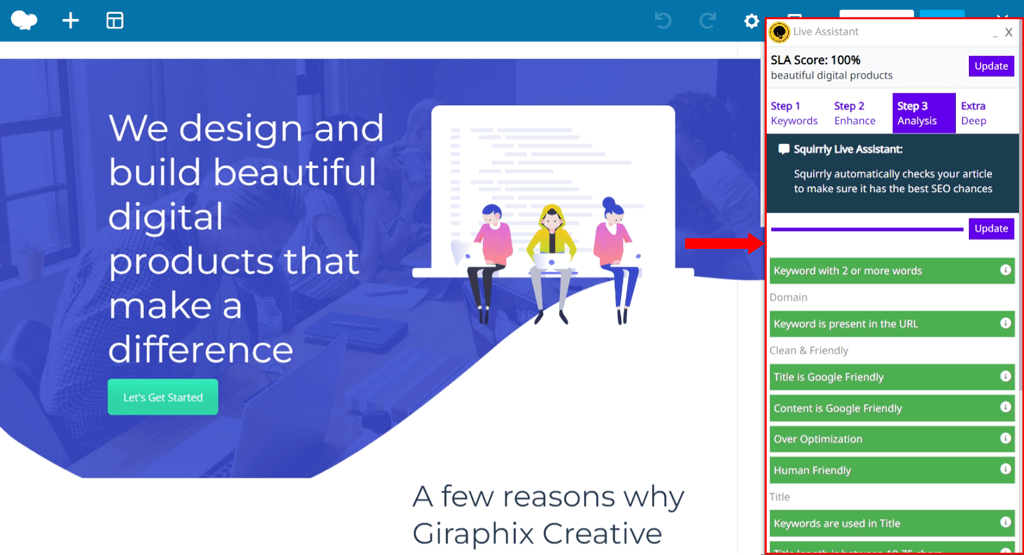
100% SEO Optimized Article
Once you turn all the tasks green in the Live Assistant, you will see the 100% optimized notification. This means that the keyword is used correctly and your post is NOT over-optimized for search engines.
After 100% Optimization
Congratulations! You’re article is 100% optimized. What now?
Now it’s time to optimize the SEO Snippet and make sure it’s ready for Social Media sharing and visible for Google. Read how to optimize the SEO Snippet in the Bulk SEO Section.
After you optimize the SEO Snippet in Squirrly, you need to attract readers:
- Share your post to your audience on Social Media.
- Use hashtags when sharing your post to attract new audiences on social media.
- Promote the post via email marketing to invite your audience to read your new post.
- Share the post on high authority Web Directories in your niche to create backlinks.
- Post comments on other blogs that write about similar topics and include a link to your post.
- If you featured someone in your content, notify the person and ask him/her to share the post on their social media networks.
- Promote your article on Facebook and Google Ads for a few days if you don’t have a base of readers just yet.
There is no single, exact recipe that will guarantee that you will reach Google’s TOP 10 with every post. But doing off-page SEO, targeting the right keywords, publishing 100% optimized posts, optimizing for multiple keywords, having over 1,500-2,000 words, and prioritizing quality are essential to getting there.
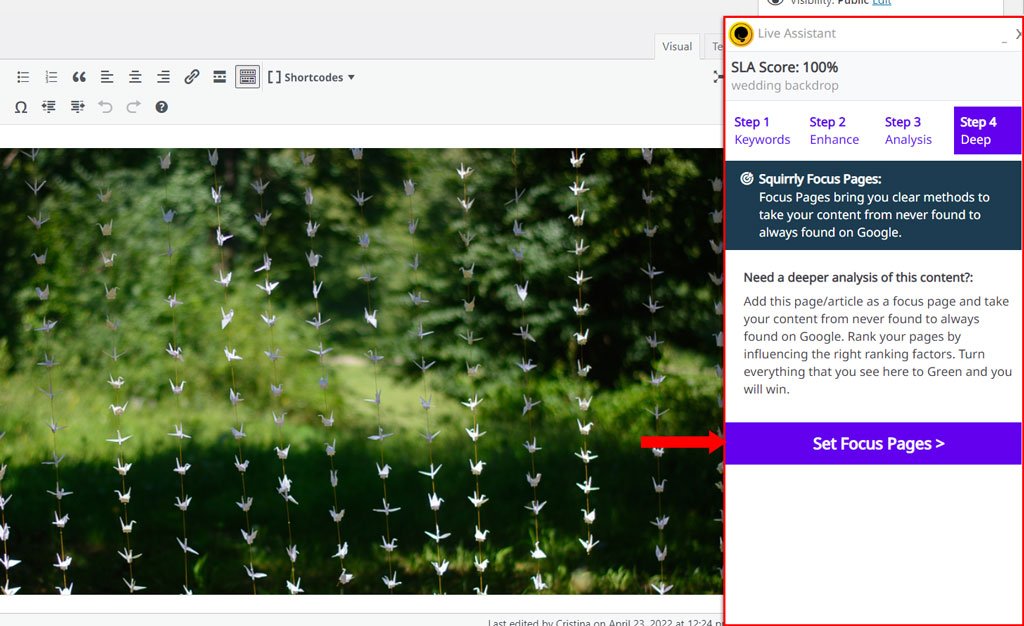
To analyze all the visibility signals of a post/page, use the Squirrly SEO > Focus Pages section to generate an Audit and see the chance of ranking. You can easily add a Page or Post to Focus Pages from the Live Assistant interface.
Go to Step 4: Deep and click on Set Focus Page.
Assistant Settings
- To access this section go to: Squirrly SEO > Optimize > Settings.
The Settings section allows you to set up your assistant just the way you like it.
We’ll go through everything you can set up in this section next.

Assistant Settings – 1) Live Assistant Tooltip Help
- To access this section go to: Squirrly SEO > Optimize > Settings > Squirrly Tooltips
Turn Squirrly Tooltip On or Off.
Having this ON is helpful to show you where to place your main keyword. (e.g. ‘Enter a keyword’) If you don’t place a main keyword, the SEO Live Assistant will be greyed out.
You can access this option from Squirrly SEO > Optimize > Settings.

Assistant Settings – 2) Fetch Snippet on Social Media
- To access this section go to: Squirrly SEO > Optimize > Settings > Fetch Snippet on Social Media
Automatically fetch the Squirrly Snippet on Facebook Sharing Debugger every time you update the content on a page. This way, you can ensure that Facebook will display the latest version of your snippet when your post/page is shared on Facebook.

Assistant Settings – 3) Download Remote Images
- To access this section go to: Squirrly SEO > Optimize > Settings > Download Remote Images
Download remote images in your Media Library for the new posts.
For SEO Images, Squirrly will save each image filename with the main Live Assistant keyword in URL.
This feature will also help prevent losing the images you add in your articles in case the remote images are deleted.

Assistant Settings – 4) Show Copyright Free Images
- To access this section go to: Squirrly SEO > Optimize > Settings > Show Copyright Free Images
Turn Copyright Free Images On or Off. We advise you keep this ON.
Activating this option will automatically check the option Show only Copyright-free images. This way, anytime you optimize a page/post for keywords and want to add images, you can search for Copyright-free images in Squirrly Live Assistant.

Assistant Settings – 5) Activate Live Assistant in Frontend
- To access this section go to: Squirrly SEO > Optimize > Settings > Activate Live Assistant in Frontend
Load Squirrly Live Assistant in Frontend to customize the posts and pages with Builders. You will need this to be ON if you’re using: Elementor, Oxygen, Divi, Thrive Architect, Bricks, WPBakery, Beaver, Zion, or the Avada Builder by ThemeFusion.

- Elementor integration
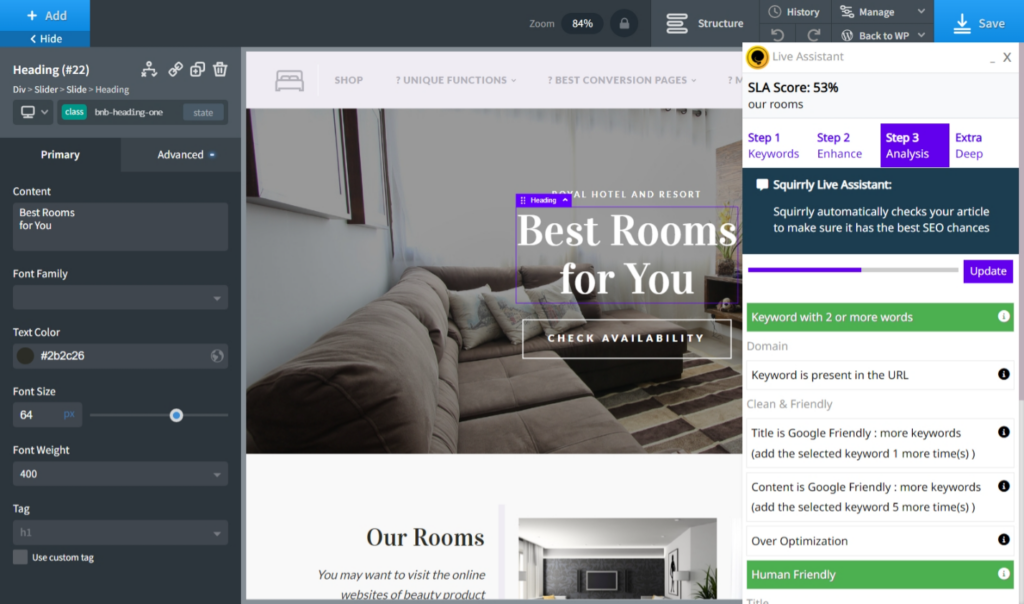
As long as you activate this option, the SEO Live Assistant will work on the front-end of Elementor, just as you’re creating or editing your Elementor page.
- Oxygen integration
As long as you activate this option, the SEO Live Assistant will work on the front-end of Oxygen, just as you’re creating or editing your Oxygen page.
- Divi integration
As long as you activate this option, the SEO Live Assistant will work on the front-end of Divi, just as you’re creating or editing your Divi page.
- Thrive Architect integration
As long as you activate this option, the SEO Live Assistant will work on the front-end of Thrive Architect, just as you’re creating or editing your Thrive Architect page.

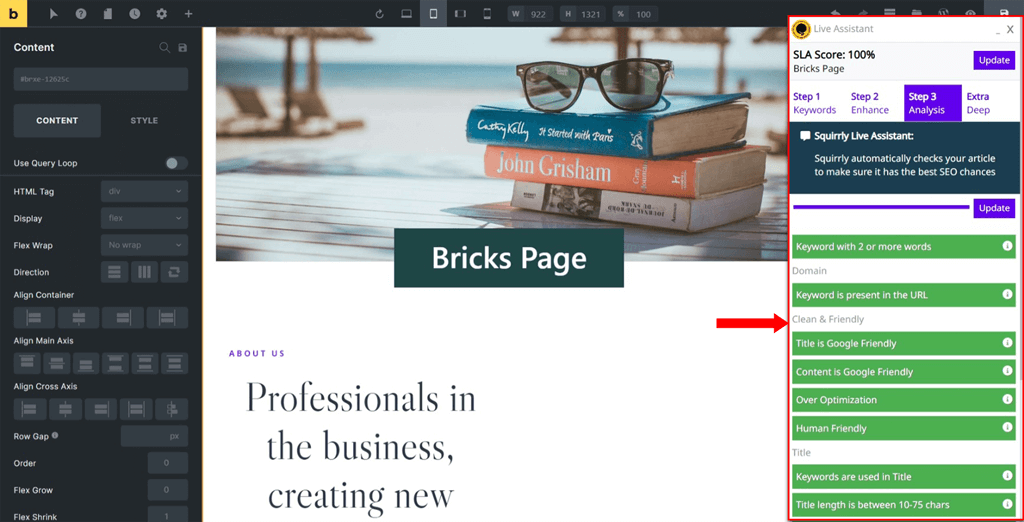
- Bricks integration
As long as you activate this option, the SEO Live Assistant will work on the front-end of Bricks, just as you’re creating or editing your Bricks page.

- Zion Integration
As long as you activate this option, the SEO Live Assistant will work on the front-end of Zion, just as you’re creating or editing your Zion page.

- WPBakery Integration
As long as you activate this option, the SEO Live Assistant will work on the front-end of the WPBakery Page Builder, just as you’re creating or editing your WPBakery page.
- Beaver Builder Integration
As long as you activate this option, the SEO Live Assistant will work on the front-end of the Beaver Page Builder, just as you’re creating or editing any page built with the Beaver Page Builder.

- Avada Fusion Builder Integration
As long as you activate this option, the SEO Live Assistant will work on the front-end of the Avada Builder, just as you’re creating or editing any page built with the Avada Builder by ThemeFusion.

Assistant Settings – 6) Disable Live Assistant for a Post Type
- To access this section go to: Squirrly SEO > Optimize > Settings > Exclusions
Exclude the places where you do NOT want the SEO Live Assistant to load inside your WordPress.
Select according to different post types that you will never want to optimize using SEO Live Assistant.
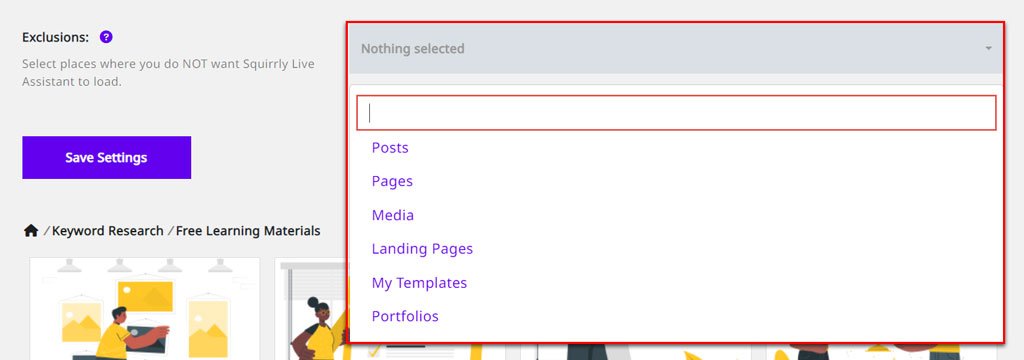
Don’t select anything if you wish Squirrly Live Assistant to load for all post types.

(IMPORTANT NOTE! The section where you can disable the SEO Live Assistant for a post type is only visible when using Squirrly SEO with SEO Expert Mode)
Live Assistant in Elementor Page Builder plugin
The SEO Live Assistant works on the Elementor Front-End. Squirrly SEO was the first WordPress SEO Plugin to offer this since 2019.
You can do Multiple Keyword Optimization using the Live Assistant together with Briefcase in Elementor Editor.

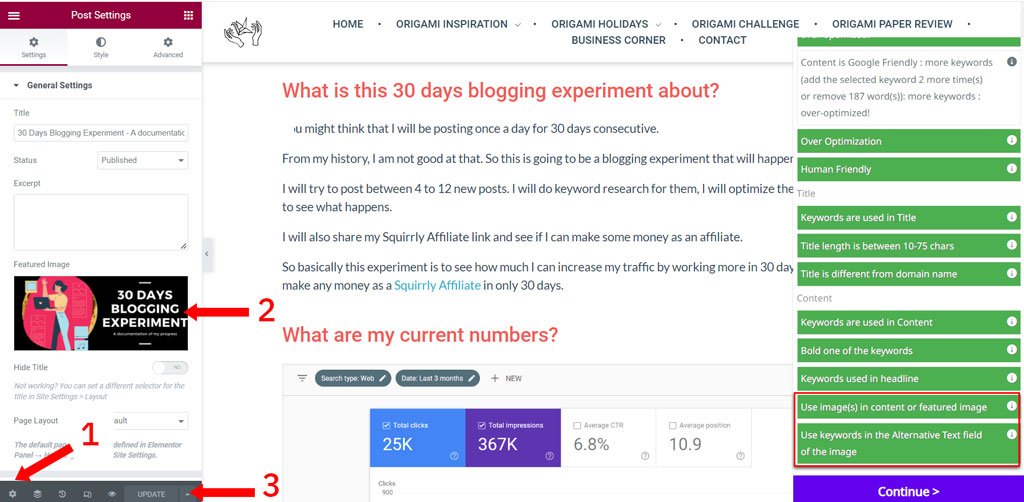
How to set a title in Elementor and complete the Title task in Squirrly Live Assistant
First you need go to Elementor Settings and add the Squirrly keyword in the Title section. Update the page and then update the Squirrly Live Assistant to grab the last information of the page in SLA.

How to set an image in Elementor and complete the Image task in Squirrly Live Assistant
There are 2 ways to complete this task:
- You can add an image to the page content using Elementor Image. Update the Live Assistant after you added the image to reload the tasks.
- Another solution is to go to Elementor Settings and add the Features image. Update the page and then update the Squirrly Live Assistant to grab the last information of the page in SLA.
Live Assistant in Oxygen Builder Plugin
The SEO Live Assistant works on the front-end of Oxygen. You can use it to optimize and enhance your content, just as you’re creating or editing your Oxygen page. You can do Multiple Keyword Optimization using the Live Assistant together with Briefcase in Oxygen Editor.
By default, the SEO Live Assistant will also load for Oxygen Templates.
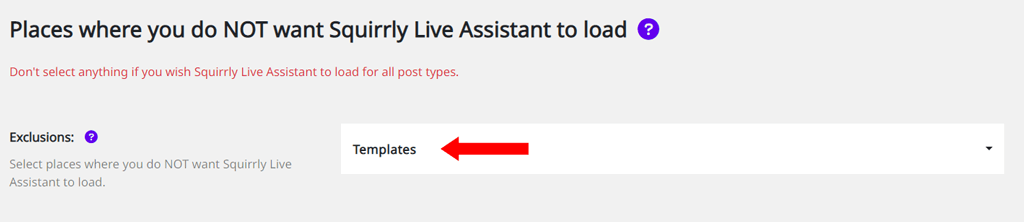
In case you don’t want the SEO Live Assistant to also load for Oxygen Templates:
- Go to Squirrly > Optimize > Settings
- Scroll down until you reach the section shown in the screenshot below
- From the drop-down, select Templates.
IMPORTANT NOTE! The section where you can disable the SEO Live Assistant for a post type is only visible when using Squirrly SEO with SEO Expert Mode.
Live Assistant in Divi Page Builder Plugin
The SEO Live Assistant works on the front-end of Divi. You can use it to optimize and enhance your content, just as you’re creating or editing your Divi page. You can do Multiple Keyword Optimization using the Live Assistant together with Briefcase in Divi Editor.

Live Assistant in Thrive Architect Plugin
The SEO Live Assistant works on the front-end of Thrive Architect. You can use it to optimize and enhance your content, just as you’re creating or editing your Thrive Architect page. You can do Multiple Keyword Optimization using the Live Assistant together with Briefcase in the Thrive Architect Editor.
Live Assistant in Bricks Website Builder
The SEO Live Assistant works on the front-end of Bricks. You can use it to optimize and enhance your content, just as you’re creating or editing your Bricks page. You can do Multiple Keyword Optimization using the Live Assistant together with Briefcase in the Bricks Editor.
Live Assistant in Zion Builder Plugin
The SEO Live Assistant Squirrly works on the front-end of the Zion Builder Editor, just as you’re creating or editing your Zion page. You can do Multiple Keyword Optimization using the Live Assistant together with Briefcase in the Zion Editor.
Live Assistant in WPBakery Page Builder Plugin
The SEO Live Assistant from Squirrly works on the front-end of the WPBakery Page Builder, just as you’re creating or editing your WPBakery page. You can do Multiple Keyword Optimization using the Live Assistant together with Briefcase in the WPBakery Page Editor.

Live Assistant in Beaver Builder (Page Builder Plugin)
The SEO Live Assistant works on the front-end of the Beaver Builder. You can use it to optimize and enhance your content, just as you’re creating or editing your Beaver Builder page.
You can do Multiple Keyword Optimization using the Live Assistant together with Briefcase in the Beaver Builder Editor.
Live Assistant in Avada Fusion Builder
The SEO Live Assistant works on the front-end of the Avada Fusion Builder. You can use it to optimize and enhance your content, just as you’re creating or editing your Avada-built page.
You can do Multiple Keyword Optimization using the Live Assistant together with Briefcase in the Avada Builder Editor.
Notes
If using other SEO plugins (Rank Math, Yoast, SEOPress, or All In One SEO) alongside Squirrly SEO, it’s important to note that Squirrly will automatically pull the keyword from these plugins into Squirrly’s SEO Live Assistant (SLA), but only if there’s NO keyword already set in the SLA.
Here’s an example of what this would look like with a keyword from Rank Math:
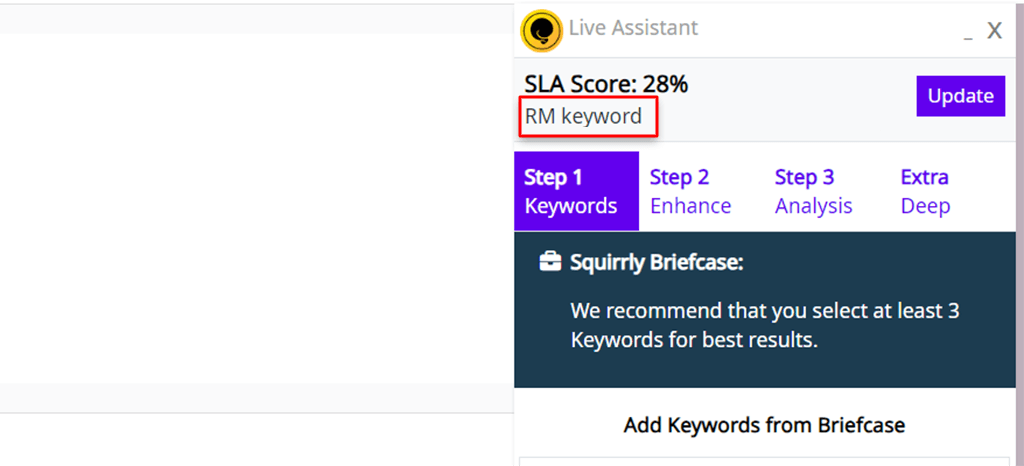
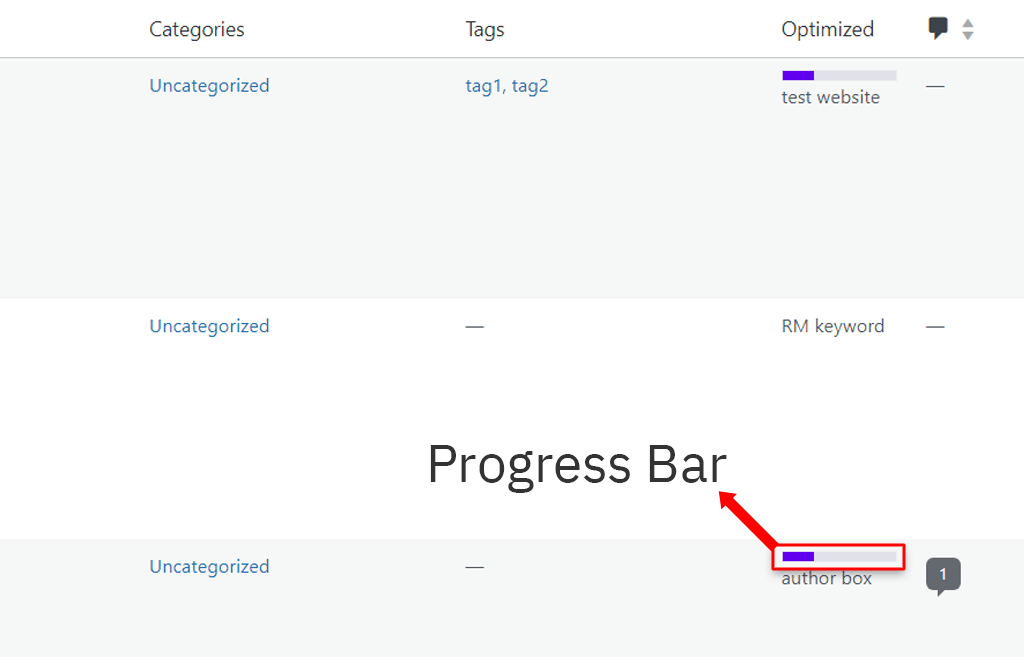
This keyword will also be displayed in the Post List (again, only if no keyword is set in the SEO Live Assistant).

However, in order to see the progress bar, you’ll need to optimize the article using Squirrly’s SEO Live Assistant.