Squirrly Cloud App
Squirrly Cloud (we also refer to it as the Cloud App) was primarily built to help site owners who are NOT on WordPress take advantage of the innovations and features from Squirrly SEO in order to create and implement winning SEO strategies and achieve better Google rankings.
About the Squirrly Cloud App
Using Squirrly Cloud, you will be able to:
- find the best keywords that your site can rank for,
- build a keyword portfolio that will enable you to implement effective SEO strategies,
- create 100% optimized articles and products,
- audit your site,
- monitor your rankings,
- and more!
^^ Does NOT require you to use WordPress as your content management system. So, even if don’t have a WP site, you’ll be able to use some of Squirrly’s top features to supercharge your Rankings!
Important!
Focus Pages are NOT available in Squirrly Cloud (Focus Pages are only available if you use ANY plan for Squirrly SEO – the plugin for WordPress). Because of how the Focus Pages system works, we are unable to offer this feature as part of the Squirrly Cloud experience.
A full comparison between what features are included in the Cloud App versus the Squirrly WordPress plugin is available here.
Login/Register to Squirrly Cloud
You can connect to Squirrly Cloud by either:
- using a Google account
- using an email address and password
Once you are connected, you will be able to see all websites that you have connected to Squirrly. (if you didn’t connect any site yet, you can easily do that within Squirrly Cloud)
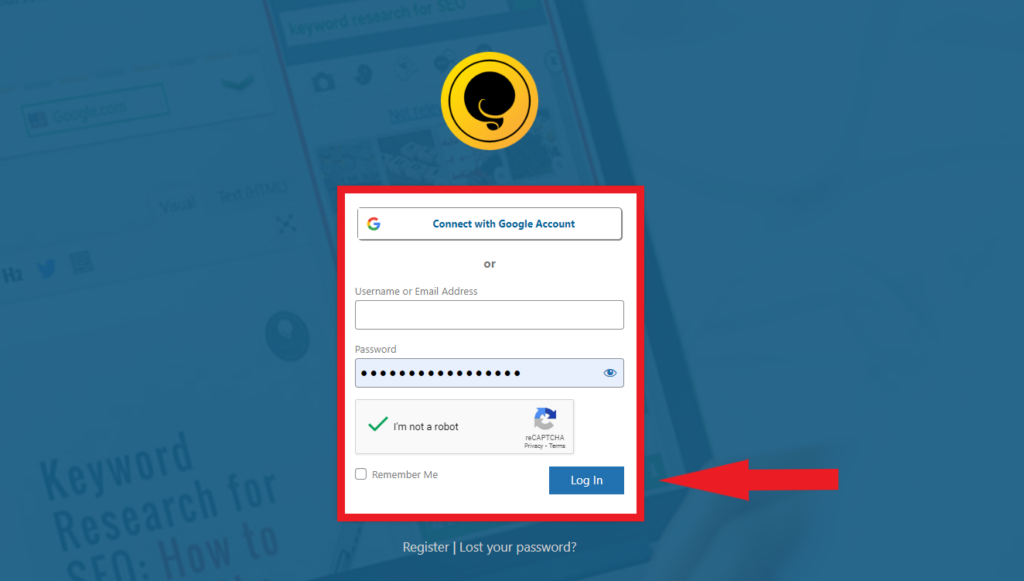
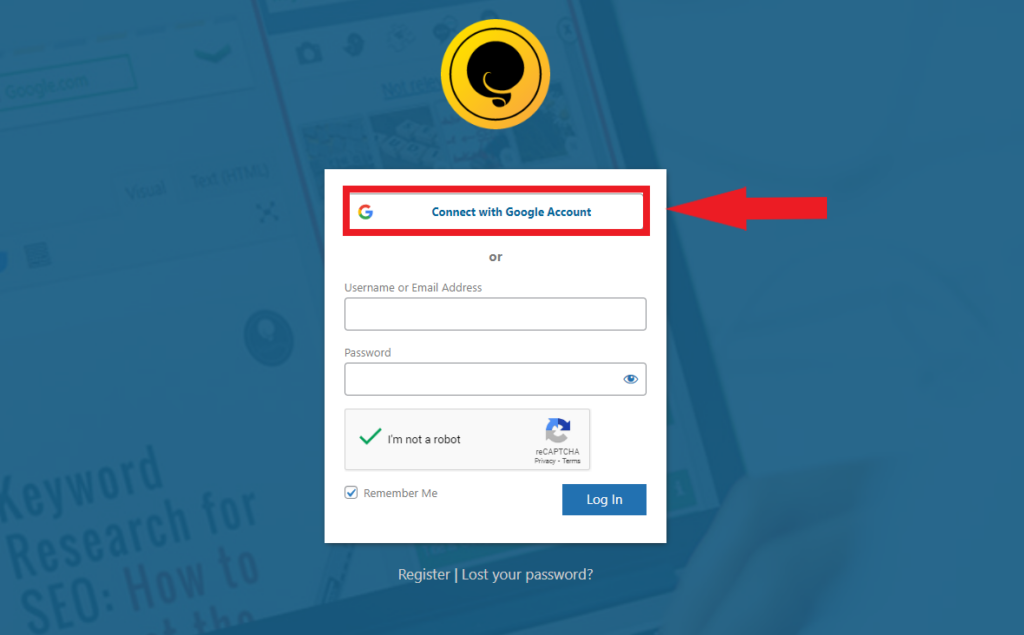
Google Account Connect
Connect to Squirrly Cloud using a Google account.
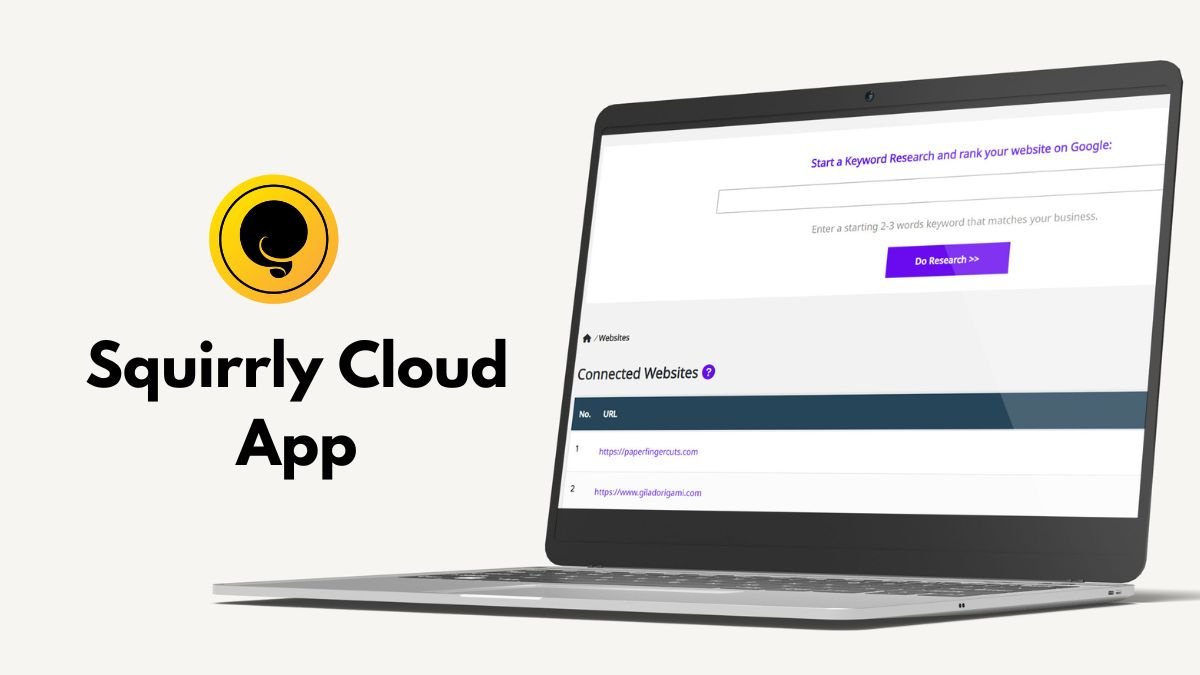
Manage Your Websites
In case you have multiple websites, you can easily add each one of them. From the drop-down menu (shown in the image below), select Manage Websites.
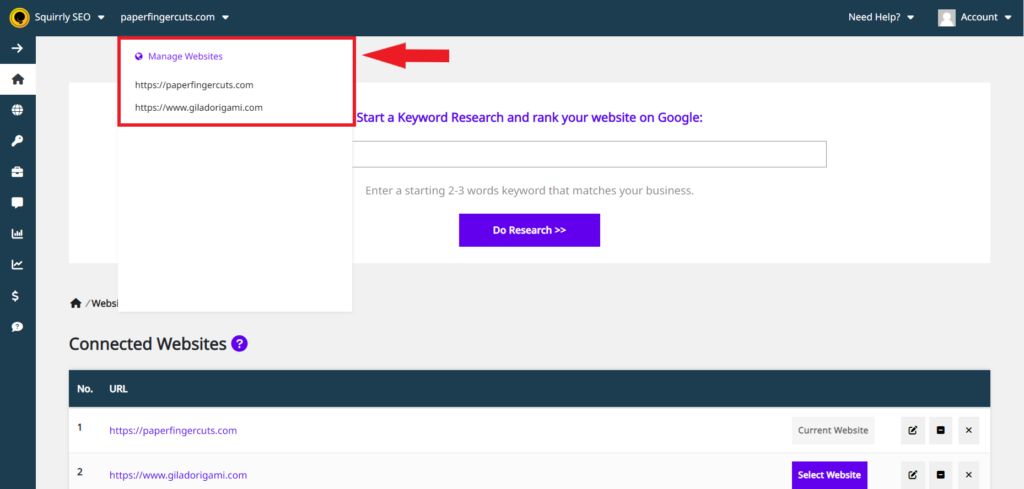
You will be able to see the list of Current Websites and have the option to add a New Website to the list.
To add a new Website, add the Website URL in the dedicated field and then click on Add Website.
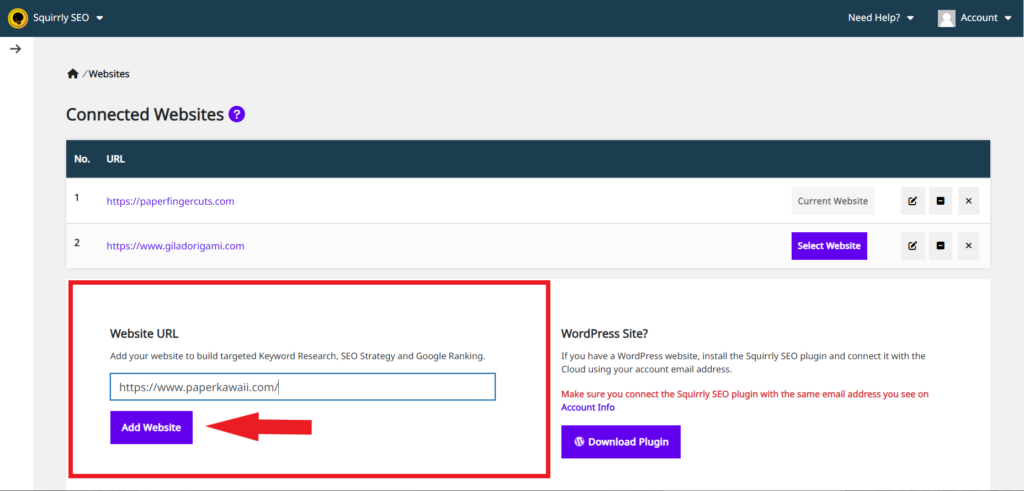
For WordPress sites, install the Squirrly SEO plugin for WordPress and connect it with the Cloud using your account email address. Make sure you connect the Squirrly SEO plugin with the same email address you see on Account info.
If you do this, your site(s) will automatically be added to this list in Cloud. (Squirrly synchronizes this information)

Change Website URL
- To reach this section, go to: Squirrly SEO Cloud App > Manage Websites
In case you change the website URL from WordPress but still want to maintain the connection with the Squirrly Cloud for that site, you can edit the website URL for your account by following the steps shown in the screenshot below.
(!! the website URL you set here should match the one you changed from WordPress exactly)
This way, Squirrly won’t create a duplicate of the same site in Cloud – as it will know you’ve not added a new site but merely updated the URL of an existing one.
And you will not lose any of the information stored in Squirrly Cloud for the website whose URL you’ve changed.

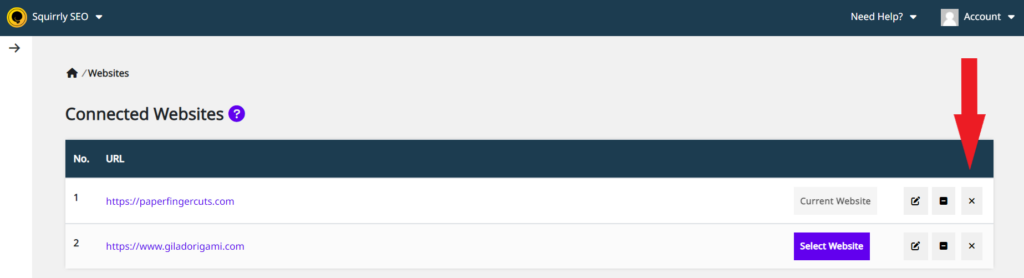
Disconnect a Website
- To reach this section, go to: Squirrly SEO Cloud App > Manage Websites
If you want to temporarily disconnect a website from Squirrly Cloud, you can do so by clicking on the symbol shown below. The site will be temporarily disconnected.

^^ (if it’s a WordPress that you’ve connected to the Squirrly SEO plugin for WordPress, you will be notified in WordPress that you should restore the Cloud connection for that website).
You can always reconnect a disconnected site. Disconnecting a site won’t DELETE it from Squirrly Cloud. All information will continue to be stored, in case you want to restore the connection.
If you want to completely delete a site, click on the X symbol. Note that deleting a site will lead to all information related to optimizations you’ve made, keyword research, and more to be deleted for that site as well.
We don’t recommend deleting a site unless you are 100% sure you will no longer need that website.
Optimize Articles / Product Pages with Squirrly Live Assistant
SEO Live Assistant works from the Cloud App and helps you optimize all your content from pages built with any builder.
Works for:
- pages,
- posts,
- and all other types of content you need to create for your site.
All you need to do is build out the text with SEO Live Assistant to make sure it’s perfectly SEO’ed (meaning it’s Search Relevant) and then you copy it bit by bit into the page, wherever you need to place each bit inside the design of the page.
^^ (a step-by-step tutorial for this is available below)
Once content is optimized, it will remain optimized – even if you copy it from the Squirrly Cloud to your site.
You will NOT lose the optimization.
Here’s a step-by-step tutorial on how to use the SEO Live Assistant from the Cloud App to optimize the entire content before adding it to your site.
Step 1: Go to Your Squirrly SEO Cloud Account
!! You get access to the Cloud, regardless of the Squirrly plan you have. When you use Squirrly SEO and you connect to Squirrly Cloud services for the first time, you automatically get access to a cloud account.
The easiest way to access your Squirrly Cloud account is directly from the Squirrly SEO > Overview section, by clicking on the profile icon, and then clicking on Squirrly Cloud. (as shown in the screenshot below)
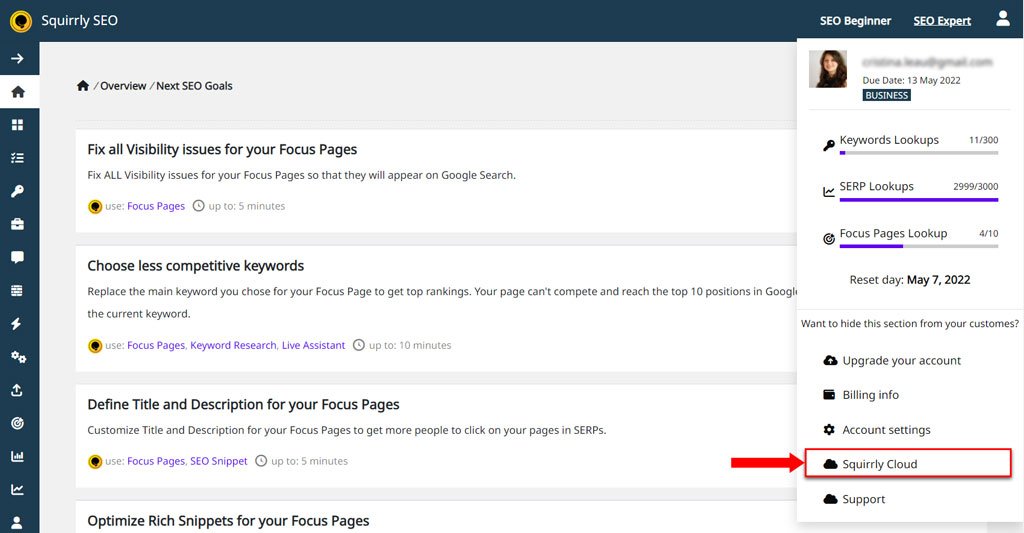
This will take you to log in to your SEO Cloud account from where you will be able to access the cloud version of the SEO Live Assistant.
Step 2: Open the SEO Live Assistant
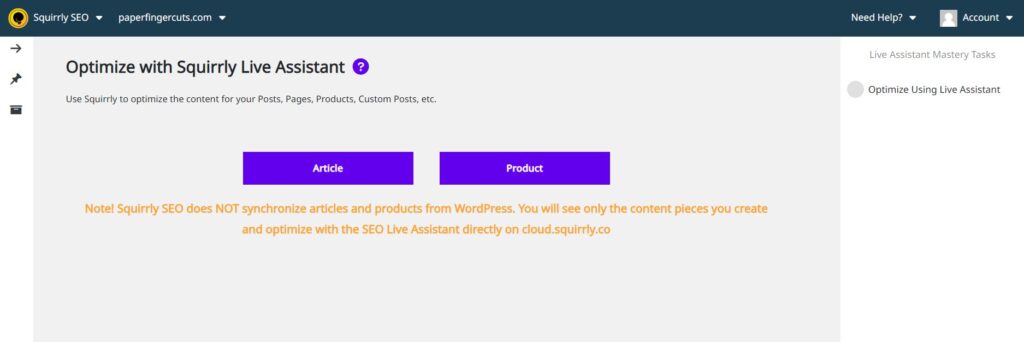
Then click on either Article or Product (if you have a product page) to open the Content Editor.
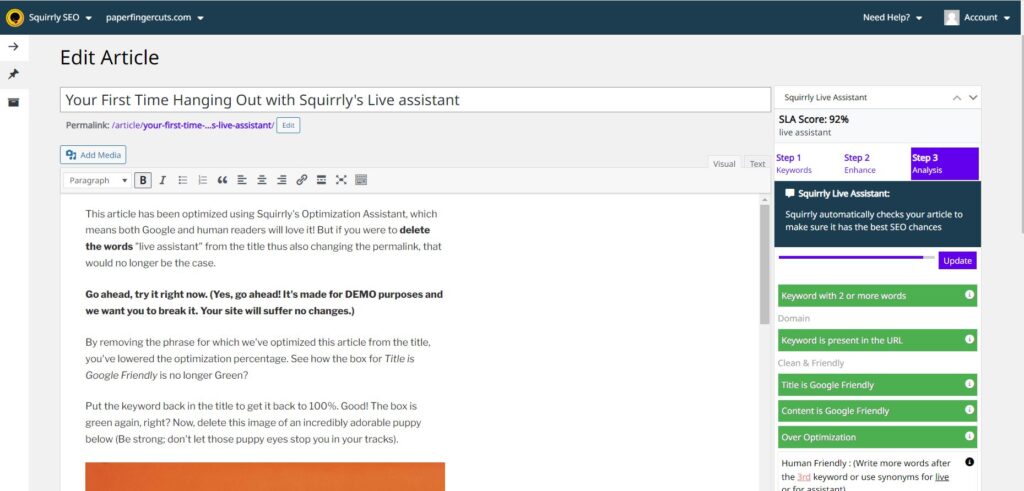
Step 3: Copy/Paste all the Content You Want to Optimize using the SEO Live Assistant. Then add your keyword.
Go to the page/article, etc. you want optimized (whether you’ve already published it or you just have it saved as draft).
COPY/PASTE all the content from that page (including the title) into the editor you see in the Cloud SEO Live Assistant.
Then add the keyword you want to rank for with that particular page inside the dedicated field.
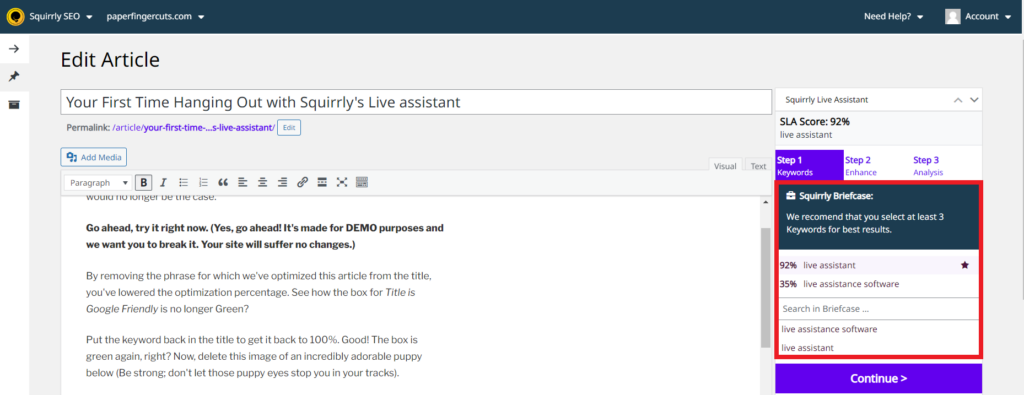
Important! To be able to add a keyword to the Live Assistant, you first have to add it to your Cloud App Briefcase.
In the example below, the keyword for this page is: “live assistant”.
Once you add your content and your keyword(s):
The Live Assistant will start analyzing your content in real-time and provide suggestions of things you need to do in order to make it 100% optimized for SEO.
You can then start implementing those suggestions on your text right there and then (everything inside the SEO assistant must be turned Green to achieve 100% on-page SEO optimization).
You will do all your optimization work inside the cloud version of the SEO Assistant.
Once you’re done with that, you’re ready to take the final step.
Step 4: Copy the Text You’ve Optimized using the Cloud Version of the SEO Live Assistant back into your Site.
Copy it bit by bit into the page wherever you need to place each bit inside the design of your pages.
Remember: Once content is optimized, it will remain optimized – even if you copy it from the Squirrly Cloud to your site.
You will NOT lose the optimization.
This means: you’ve started with basic text that you’ve copied from your site and ended up with 100% Optimized text that was checked by our SEO Live Assistant and now has much better chances of ranking on Google.
Note! Squirrly SEO does NOT synchronize articles and product pages from WordPress. You will ONLY see the content pieces that you create and optimize with the SEO Live Assistant directly on cloud.squirrly.co
Good to Know
- You can choose to have the section highlighted below be displayed ABOVE or UNDER the Squirrly Live Assistant. To move it, simple use the two arrows shown in the screenshot below.

- You can use the SEO Live Assistant from the Cloud App to optimize for multiple keywords you’ve saved to your Cloud Briefcase. Add all keywords you want to optimize for, and the Assistant will automatically calculate optimization Scores for all secondary keywords.
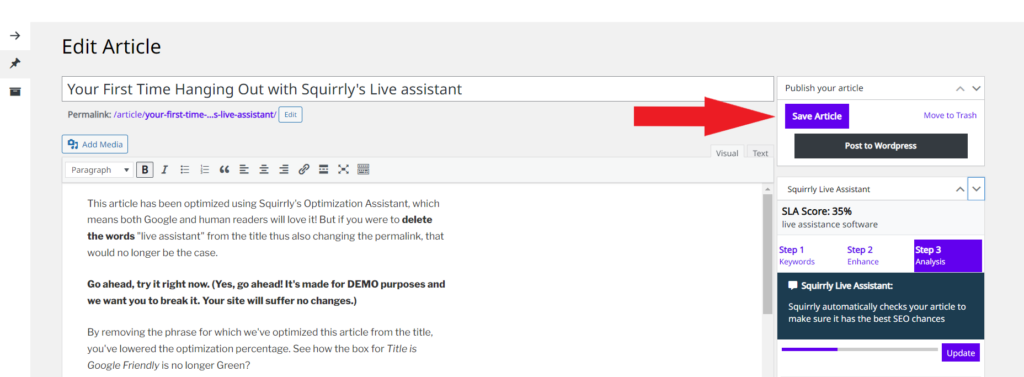
- Previous articles you’ve worked on can be stored inside your SEO Cloud account database.
This way, you will be able to resume working on optimizing a piece of content you’ve copied from your site and into the Cloud SEO Live Assistant editor without losing your progress. Just make sure to save your work by clicking on the Save button before leaving the Squirrly Cloud interface.
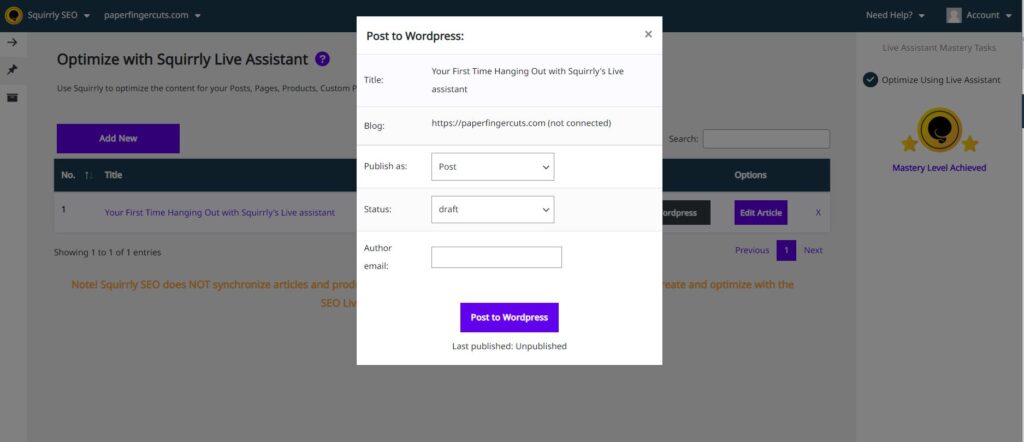
Publish to WordPress
If you created an optimized article using the SEO Live Assistant from Squirrly Cloud, you can publish it to WordPress – straight from the Cloud App.
Go to Live Assistant > Articles.
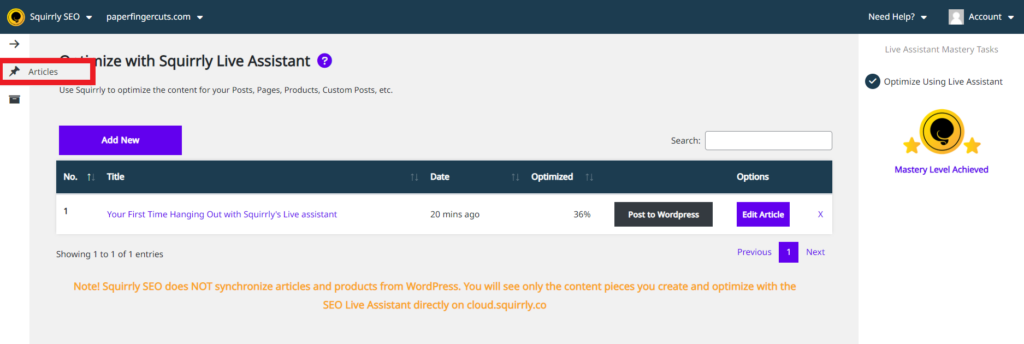
Go to the article you want to post to WordPress, and then click on Post to WordPress. A pop-up like the one you see below will appear:
- select how you want the post to be published (you can select the post type and the status)
- enter your Author email
Once you are happy with the settings you’ve made, click on Post to WordPress. And that’s it! You will be able to see your post in WordPress.
Keep in mind that this will only work if your WordPress site is connected.
A similar process can be used to post Product Pages optimized with the Live Assistant from Squirrly Cloud to WordPress.
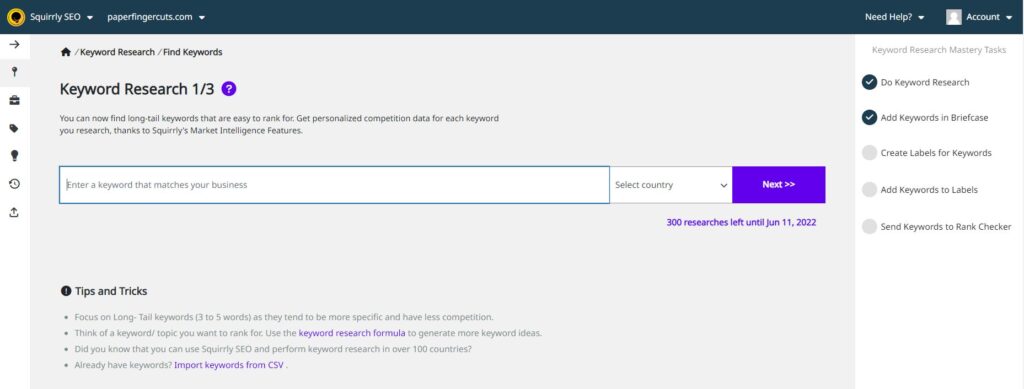
Keyword Research
- To reach this section, go to: Squirrly SEO Cloud App > Keyword Research
Squirrly’s keyword research tool works from the Cloud App to help you find new keywords ideas, analyze their potential and organize them into tighter groups using Briefcase.
You can learn more about this feature and how to make the most out of using it here >>
SEO Audits
- To reach this section, go to: Squirrly SEO Cloud App > SEO Audit
The SEO Audit feature from Squirrly Cloud works pretty much the same as the SEO Audit Suite from Squirrly SEO – the plugin for WordPress.

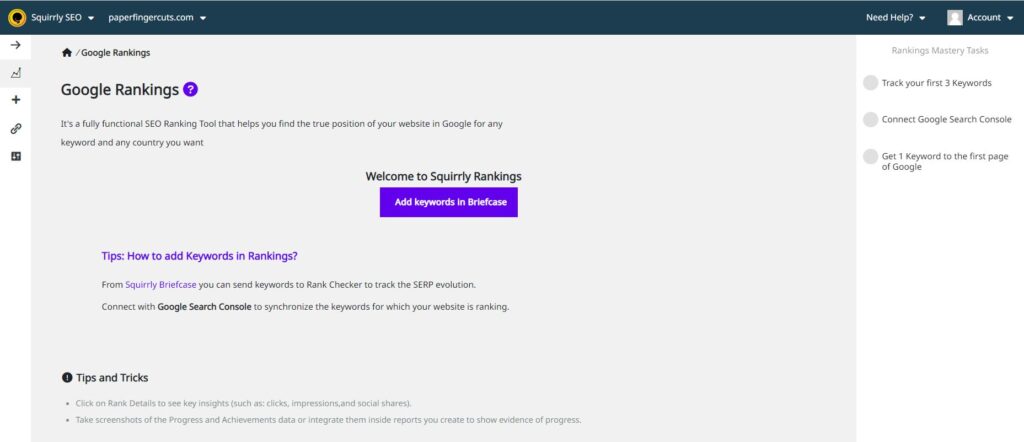
Google Rankings
- To reach this section, go to: Squirrly SEO Cloud App > Google Rankings
The Rankings feature from Squirrly Cloud works pretty much the same as the Rankings section of Squirrly SEO (the plugin for WordPress).
Learn more about the Rankings feature and how to make the most out of here >>
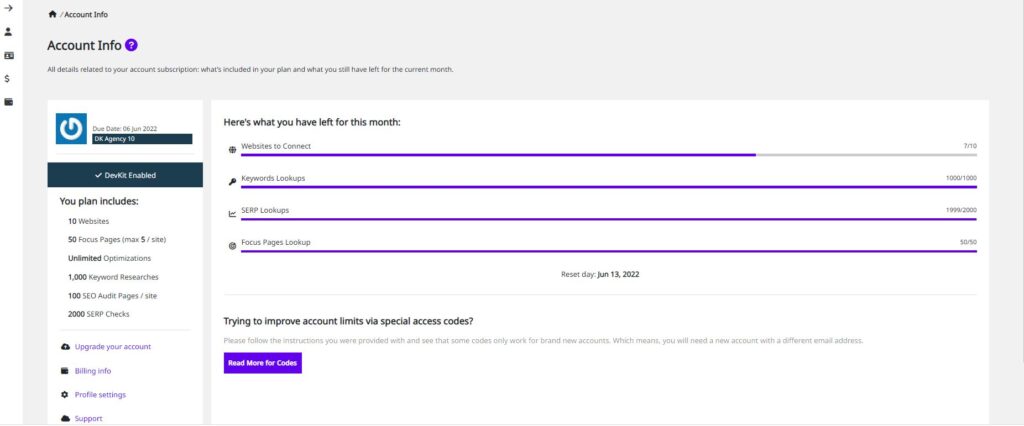
Account Info
How to get access to Account Info: go to Account > Account info
In case you have a paid Subscription, in the Account Info section, you can see:
- all details related to your account subscription: what’s included in your plan and what you still have left for the current month;
- the date on which your subscription will expire
- your order history (if it exists)
- the email address you used to connect to Squirrly
- if you have the Dev Web Kit, it will be mentioned in this section as well.
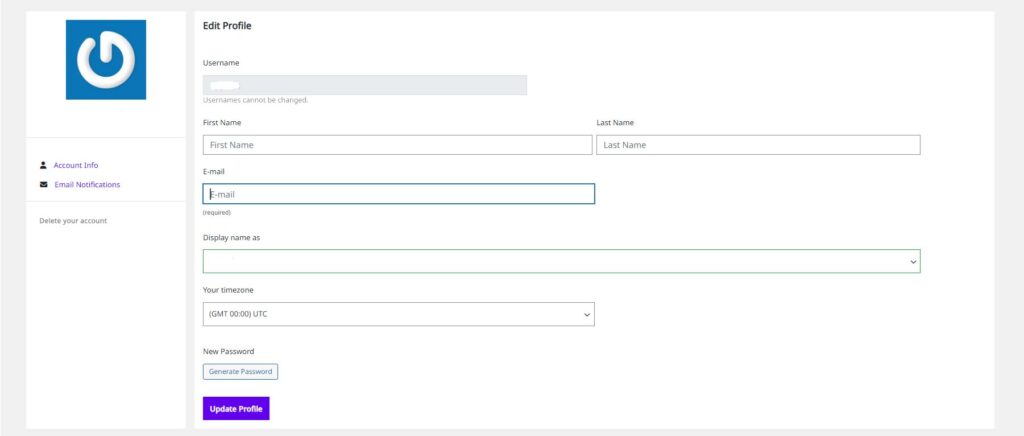
User Profile
How to get access to User Profile: go to Account > User Profile
In the User Profile section, you can do things like:
- edit your First and Last Name
- edit your email address
- select your timezone
You can also DELETE your account from this section by clicking on Delete Your Account. Add your password to confirm that you want to delete your account, and your account will be deleted.
Manage Orders/Subscription
You can manage your subscriptions from the Order History section. Go to Account > Pricing & Plans > Order History to access this section.
In this section, you can:
- see your order history for all subscriptions
- update your payment information (e.g. card details)
- cancel current subscriptions

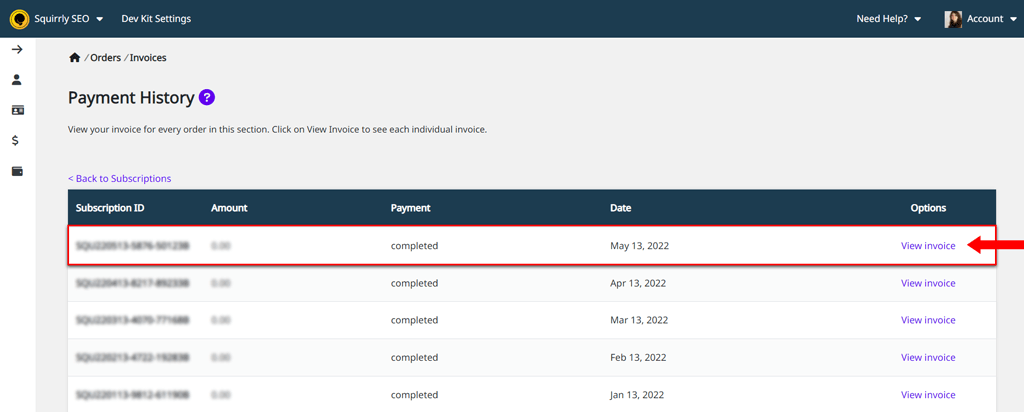
View Order Invoice
View your invoice for every order in this section. Click on View Invoice to see each individual invoice.
Squirrly SEO Stats
In your dashboard, you have quick access to key Squirrly SEO Stats that give you an overview of your activity and site performance:
- Articles optimized so far (shows you how many posts you’ve optimized using the SEO Live Assistant)
- Average optimization (shows you the average optimization percentage for posts optimized using the SEO Live Assistant)
- Keyword researches (shows you how many keyword researches have been performed for that site)
- Keywords stored in Squirrly Briefcase (shows you how many keywords you currently have saved to Briefcase for that website)
- Pages ranking in top 100 of Google (show you how many pages on your site currently rank in the top 100 of Google)
- SEO Audits (shows you the total number of audits generated for your website)
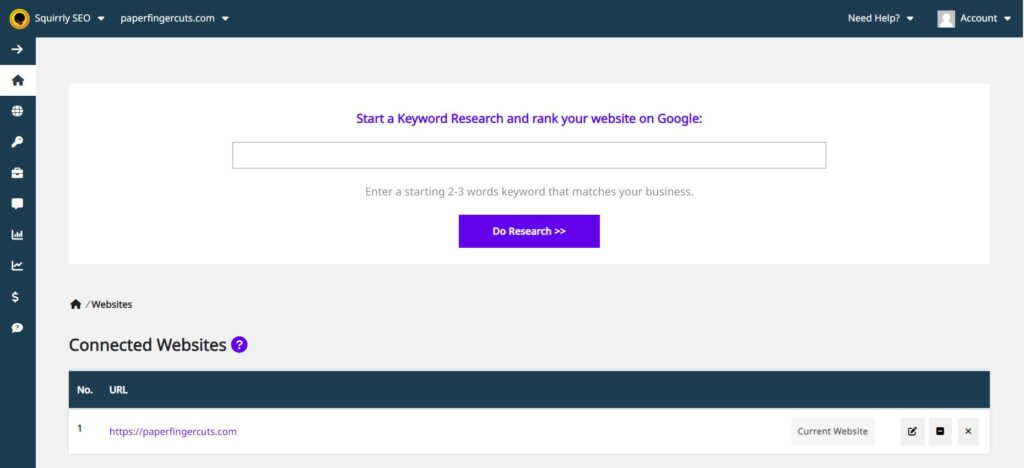
All stats are shown for the current site. (current site = the site you see in the left, upper corner of the screen; in the example below: paperfingercuts.com)
In case you have multiple sites, you can select the site from your list of sites, and you’ll see Squirrly SEO stats for the site you’ve selected.