Bulk SEO & Snippet

Having a way to monitor and customize the SEO for all the posts, pages, products, custom posts, categories, tags, and even author profiles would be great, right?
With Squirrly SEO > Optimize > Bulk SEO, we offer you a dedicated place to customize the SEO for the entire website.
No need to be an SEO expert, as Bulk SEO not only lets you customize the SEO but also provides step-by-step guidance to help you set the best METAs, Open Graph, Twitter Card, JSON-LD Structured Data, and Visibility settings.

Bulk SEO is a revolutionary feature that, if used right, has the power to improve the SEO for WordPress site.
What’s more, we made it user-friendly by creating a fun-to-use system that will help you correct the SEO for the entire website in just minutes. All you have to do is turn Red Elements Green, and you will score massive SEO gains for your site.
BULK SEO Navigation is also meant to make working on optimizing your posts as easy as possible:
- Gives you a link directly to the page
- Gives you a link to start editing that page. Just click and start editing.
▶️ Feature walk-though [from minute 25:49 – 36:00]
What Squirrly Bulk SEO does for you and your website?
- You can browse all the posts by post types and post status.
- Preview & Edit the METAs (see and control how Google will display your pages in search results).
- Preview & Edit the Open Graph (see and control how your pages will look when shared on Facebook, LinkedIn, and other Social Media networks).
- Preview & Edit the Twitter Card (see and control how your pages will look when shared on Twitter)
- Preview & Validate the JSON-LD Structured Data.
- Customize the visibility in Search Engines ( Noindex and NoFollow links ) and Sitemap.
- Customize the Schema Type (Website, Article, Product, Video, Book)
- Customize Canonical Link for external canonical.
- Lets you view all Snippets from your pages. In one huge Overview.
- Additional Option for Snippet, Meta Data, Schema, Open Graph, Visibility: Edit Snippets in BULK for all post types.
Settings Assistant for Bulk SEO

Another awesome feature added in Bulk SEO is the Assistant that provides step-by-step guidance and alerts you of problems through color-coding.
Each Red or Green dot from each section in BULK SEO is clickable. Hover over the dots to find info about them. You can also click on them to get more info on how to solve the task.

- Click to open the Snippet Editor below that line.
- Click and you will see TASKS on the right side of the screen.
The assistant will let you know if your METAs have the right content, keywords, images, and more. You will also get notified if you added a wrong canonical URL or if you didn’t add an image in Open Graph.
This way, you can make sure you’re not overlooking essential optimization aspects while also saving precious time.
The right side of the screen from BULK SEO also highlights the URL of the page and the Keyword that the SNIPPET was optimized for. Please keep in mind that the keyword from Snippet should be the same as the one from SEO Live Assistant. Should be the same Main Keyword (focus keyword) for the page.
Also on the right side of the screen: you will see more Dots. When you click on them, they open Pop-Ups with information, so you’ll know how to turn complete the associated tasks.
You will receive a lot of training by opening those pop-ups and learning from them. Very clear examples on some of those items, to help you understand how to apply them to your own business.
You also have the option to Deactivate one of the Checks made, in order to complete the tasks. This is done from the pop-up that opens when clicking a dot from the right side of the screen.
To make everything even easier to use, BULK SEO offers filters, so you can easily view the pages that have a certain kind of problem that needs to be fixed (meaning: which is still with a RED dot) for every post type.
Access Bulk SEO
Search in Bulk SEO
- To reach this option, go to: Squirrly SEO > Optimize > Bulk SEO
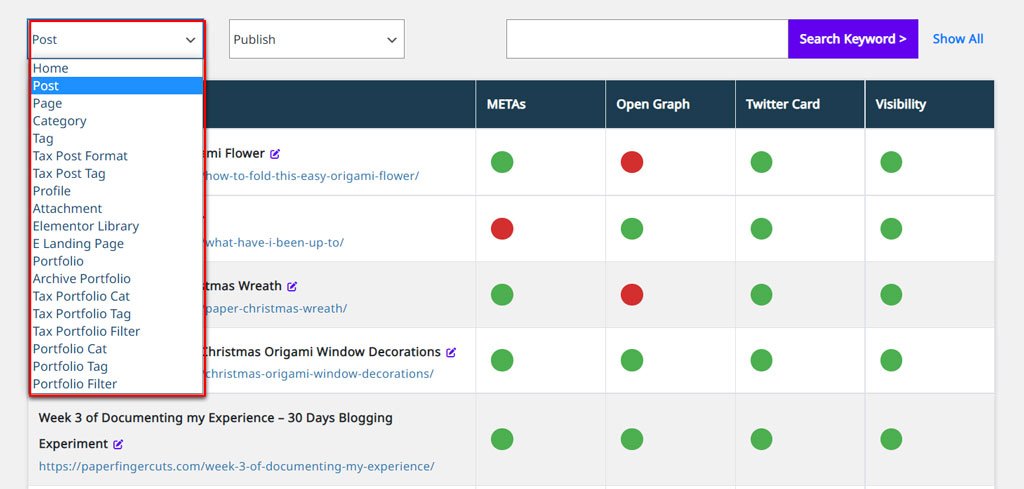
By default, the search option in Bulk SEO is set to: Posts with any status (meaning you’ll see all posts from your site, regardless of Publish status)
However, you can also:
- Select to SEE only some kinds of Post Types (like: Pages or Posts)
- Select to SEE pages according to Publish status (Draft, Publish, Pending, Future, or Private)
So, for example, if you want to make sure that all your posts have an optimized Snippet before they are published, you could select to view all posts that have Draft as their status and BULK SEO will show you which of your snippets for those posts require your attention.

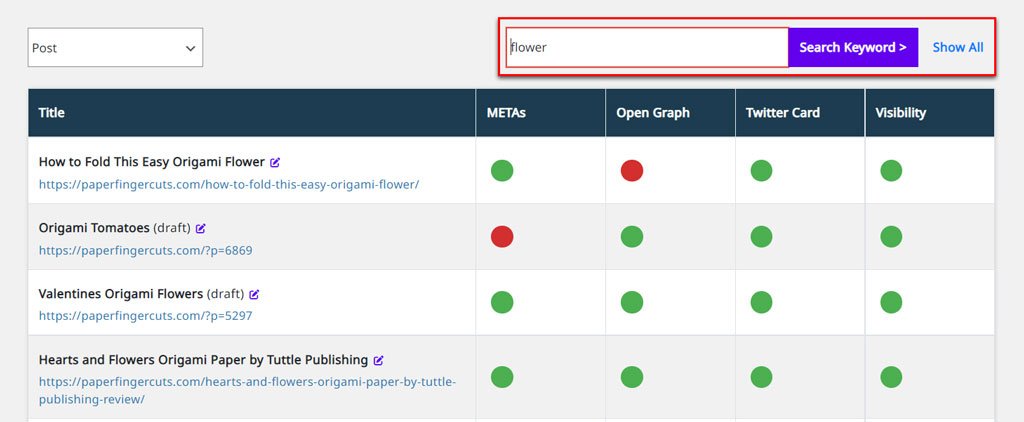
You can also search a post by keyword, using the search bar in Bulk SEO and then clicking on the Search Keyword button. (as shown in the image below)
Submit any Published URL to the IndexNow API
- To reach this option, go to: Squirrly SEO > Optimize > Bulk SEO
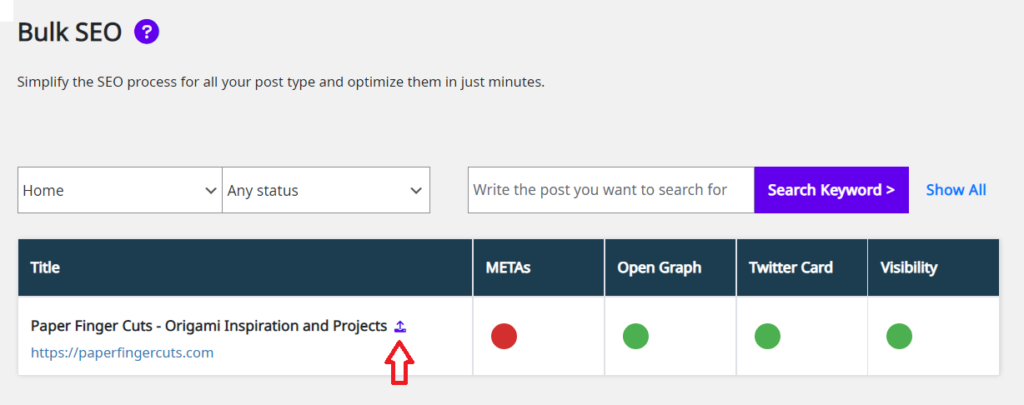
IndexNow is a new protocol developed by Microsoft and Yandex which allows website owners to instantly notify search engines (Bing & Yandex, for now) whenever website contents on any URL is created or updated.
In turn, this makes it possible for IndexNow-enabled search engines to quickly crawl and discover new URLs, as well as reflect website content changes in their search results sooner.
To submit any of your published URLs to the IndexNow API via the Bulk SEO section, click on the Arrow icon shown in the screenshot below.
Open Bulk SEO Snippet
- To reach this option, go to: Squirrly SEO > Optimize > Bulk SEO
To open the SEO Snippet for a post, all you need to do is to click on a circle (the ones next to the post you want to optimize, right side).
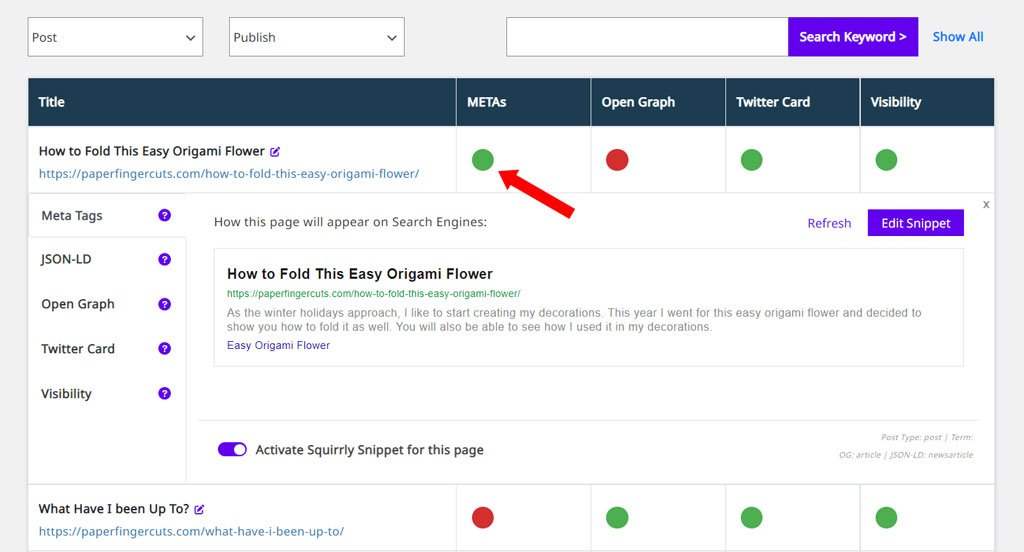
If you click on the METAs circle, the Snippet and Assistant will open the METAs section.
If you click on Open Graph circle, the Snippet and Assistant will open the Open Graph section, and so on.
If the Assistant notices any issue in one of the section, the circle will be unchecked for that particular section.
If the section is correct, the circle will be checked.

Edit the METAs section
- To reach this option, go to: Squirrly SEO > Optimize > Bulk SEO > and click on the METAs circle
To edit the SEO Snippet, all you need to do is to click on the Edit Snippet button.
The Snippet will switch from preview to edit mode where you can customize the METAs as you like.

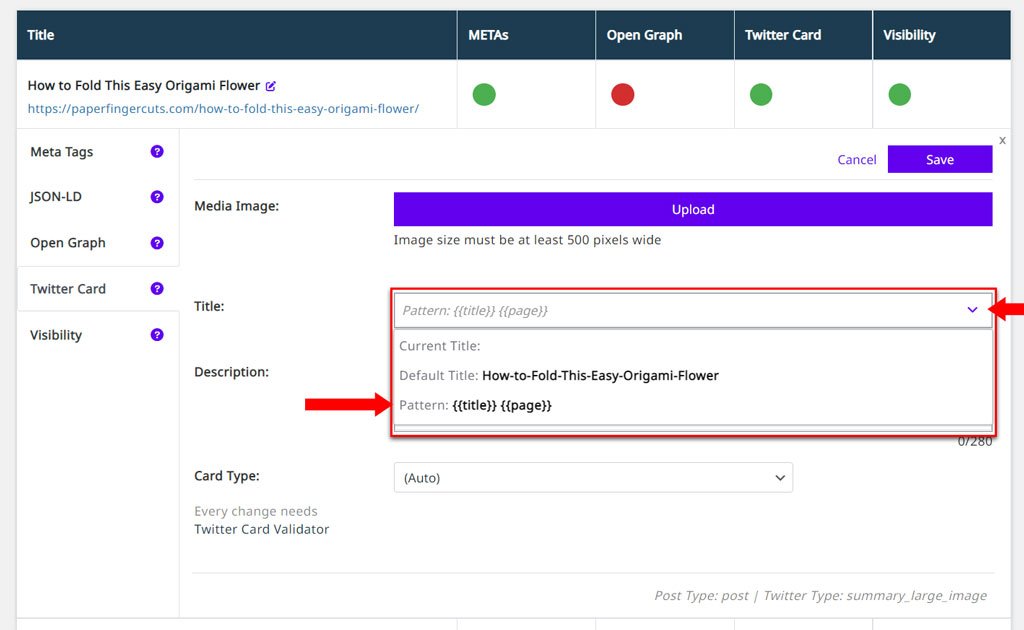
If the Squirrly SEO > Optimize > Automation > Automation – Configurations is active, you will notice a blue arrow on the right side of each field from where you can select the available automation patterns. To insert a pattern, simply click on the pattern that you want to insert.


You can see as a placeholder the default patterns for each META.
The default patterns can be set in Squirrly SEO > Optimize > Automation > Automation – Configurations for every post type.
If you want to customize the patterns for a particular post, select the patterns from the list. If you move the mouse over the patterns or over the input field, you can see the pattern’s value.
In the METAs section, you can also customize the Description, Keywords, Canonical link (only if you have an external canonical).
Once you finished customizing the snippet for the METAs section, click on the Save button, and the Snippet preview will show the custom information.

Once you saved the snippet, the Bulk SEO Assistant will also update the tasks shown on the right of the screen and let you know if you optimized the Snippet correctly. Your goal should be to complete all tasks.

When you Open the Snippet for one of the Pages, Squirrly also offers you Navigation Aid:
- Close button
- Refresh Button
- Edit Snippet button
- When you look at the Snippet it already shows you (for FREE: unlike Yoast and RankMath) the preview on Search and Social Media
- Question marks – click to find out more about that particular item – directly inside Howto.Squirrly.co
- Highlights Post Type
- Highlights Open Graph Type
^^ so you get tons of clever info, navigation and buttons at a glance.
! Important
In Bulk SEO, you have the option to deactivate the Snippet generated by Squirrly SEO at an Individual Page level. You may have a couple of pages where you won’t need Squirrly’s SNIPPET activated. This is the feature that helps you do this at a page level.
Slide the toggle that reads Activate Squirrly Snippet for this page to the left to deactivate the snippet generated by Squirrly SEO for that page (URL).

Edit the Open Graph Snippet
- To reach this option, go to: Squirrly SEO > Optimize > Bulk SEO > and click on the Open Graph circle
Having an optimized Open Graph for your post time is extremely important. The most important things you need to focus on when editing the Open Graph are:
- the title
- image
- OG type
- the hashtags used in description.

By default, Squirrly SEO uses the featured image of the post as the Open Graph image.
If the post doesn’t have a featured image, it will use the first image used in the content of the post. We encourage you to use a custom image for the Open Graph so that the Snippet preview will display your full image. (as a best practice, for Facebook and Twitter shares, image size should be in the range: 500 to 800 pixels wide)
If the current post is an article or a product page, make sure that the Snippet knows that. Select the correct OG type so that Facebook receives the right information.
You can set the default OG type for your current post type in Squirrly SEO > Optimize > Automation > Automation – Configurations.
To set the OG type at a page level, you can select the OG type you want from the drop-down menu, and the OG type you select will apply at an individual page level.
If you don’t set a custom Open Graph title and description, the Snippet will use the title and description from the METAs section instead. Use patterns to edit the title and description, or write custom ones.
To complete the Open Graph snippet, you can customize the author’s name or add the author’s social media profile links, and the information will show in the Snippet when the post is shared on Facebook. For multiple authors, separate their links using commas.


Edit the Twitter Card Snippet
- To reach this option, go to: Squirrly SEO > Optimize > Bulk SEO > and click on the Twitter Card circle
Twitter shares can bring you more visitors if your post snippet is shown in every share. Make sure you use attractive images, titles, and descriptions with hashtags.
Click on the Twitter Card circle in the post row to open the Twitter Snippet and Assistant.
First, the Twitter card preview will show in the Snippet.
To customize the Twitter Snippet, Click on the Edit Snippet button and the Snippet preview will switch to edit mode. Use patterns to edit the title and description, or write custom ones.
By default, Squirrly SEO uses the featured image of the post as the Twitter Card image. If the post doesn’t have a featured image, it will use the first image used in the content of the post.
If you don’t set a custom Twitter title and description, the Snippet will use the title and description from the METAs section instead.

Twitter Card Snippet Assistant
- To reach this option, go to: Squirrly SEO > Optimize > Bulk SEO
If there is an SEO issue that you need to fix for your Twitter, you will see Unchecked Circles in the right side of the screen. In the example below, all circles are Checked, indicating that all tasks required for this Twitter Card have been completed.

Clicking on an Unchecked/ Grey Circle will open Task Details that will offer more information about the task and exact steps you need to take in order to complete it.
Check the Assistant tasks every time you save the Snippet and make sure all the circles are checked.

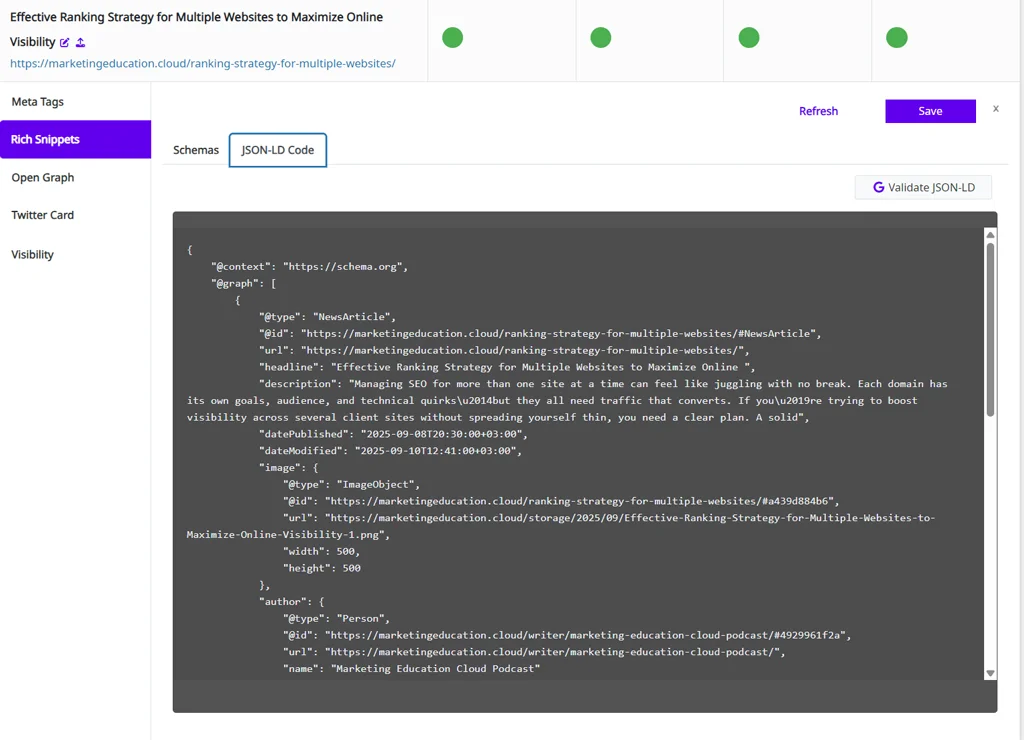
Edit the JSON-LD Structured Data
- To reach this option, go to: Squirrly SEO > Optimize > Bulk SEO
This feature is very important because Google looks into JSON–LD Schema to deliver more easily indexable content. JSON–LD (JavaScript Object Notation for Linked Data) offers an easier way to create machine-readable data from websites to promote search results.
Having relevant Schema information for JSON-LD for each post type is also very important.
Before you start to edit every snippet, make sure you set the right JSON-LD/OG Type in Squirrly SEO > Optimize > Automation > Automation – Configurations for each post type.

Once you set the right JSON-LD Type in Automation, you need to make sure that Google receives a valid JSON-LD from your website.
Validate JSON-LD Rich Snippet
- To reach this option, go to: Squirrly SEO > Optimize > Bulk SEO
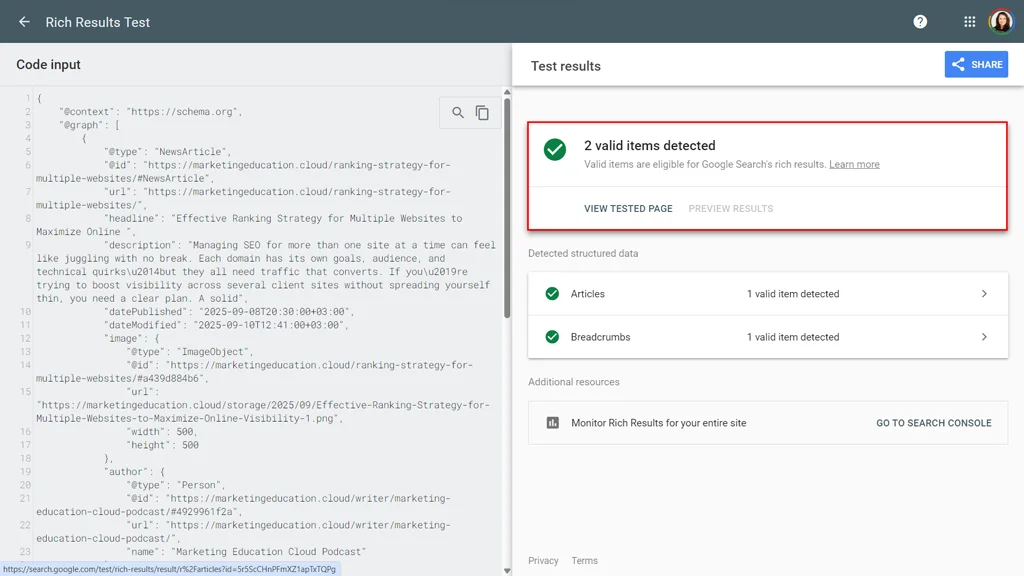
Validate the JSON-LD from your snippet and if Google Structured Data Testing Tool says that it’s valid it means that you have the right information.
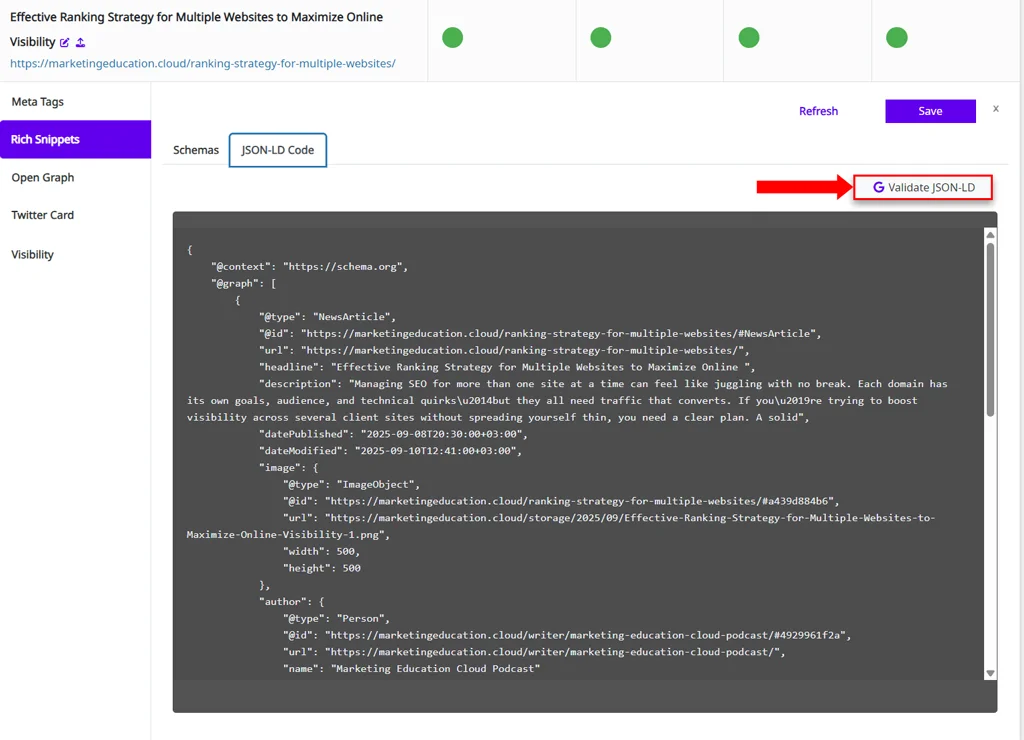
You will be redirected to https://search.google.com/test/rich-results with the JSON-LD code from Squirrly SEO. You can also validate an URL and see if all the JSON-LD data from other plugins are also correct.
Custom JSON-LD Schema Code
- To reach this option, go to: Squirrly SEO > Optimize > Bulk SEO
You can also add a custom JSON-LD if you want to add reviews, product data, or custom Schema data. Select the JSON-LD code as custom and add your JSON-LD custom code. Save the Snippet, and you’re done.
Note! The settings you make here will overwrite the settings made in SEO Automation for the post type your URL belongs to.
The option for JSON-LD code (shown below) will only show when using Expert Mode. We recommend leaving this to Auto unless you are an SEO expert and know exactly what you are doing.

Advanced Custom Fields Plugin Integration
If you have a plugin such as Advanced Custom Fields, you can customize the JSON-LD code for a particular URL on your site.
Download ACF Plugin here: https://wordpress.org/plugins/advanced-custom-fields/

Create custom JSON-LD here: https://technicalseo.com/seo-tools/schema-markup-generator/

Multiple JSON-LD Types
- To reach this option, go to: Squirrly SEO > Optimize > Bulk SEO
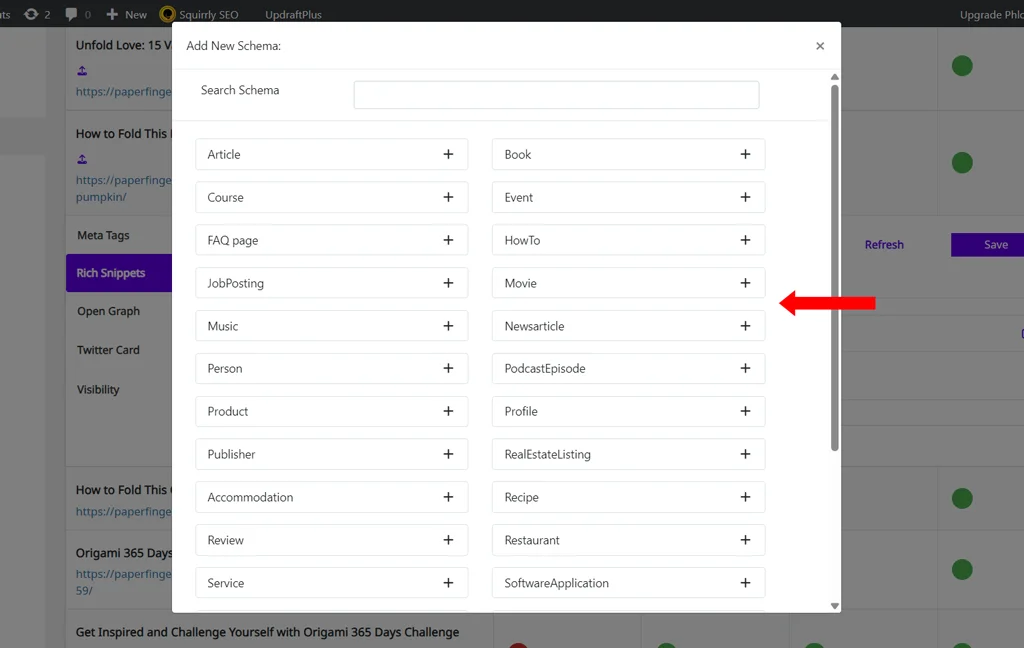
You can select multiple JSON-LD types and:
- Create Schema for Article
- Schema for Movie
- Schema for FAQ page
- Schema for Question
- Schema for Local Restaurant
- Schema for Local Store
- Schema for Profile
- Schema for Review
- Schema for Recipe
- Schema for Video
- Schema for Website
- Schema for News article
Note! The settings you make here will overwrite the settings made in SEO Automation for the post type your URL belongs to.
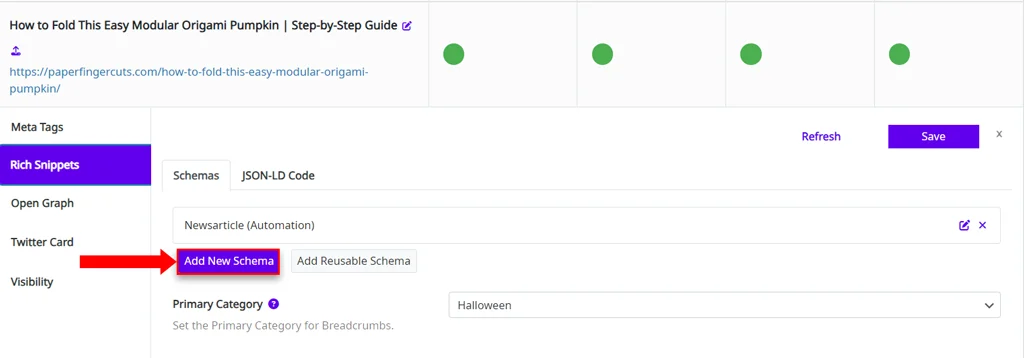
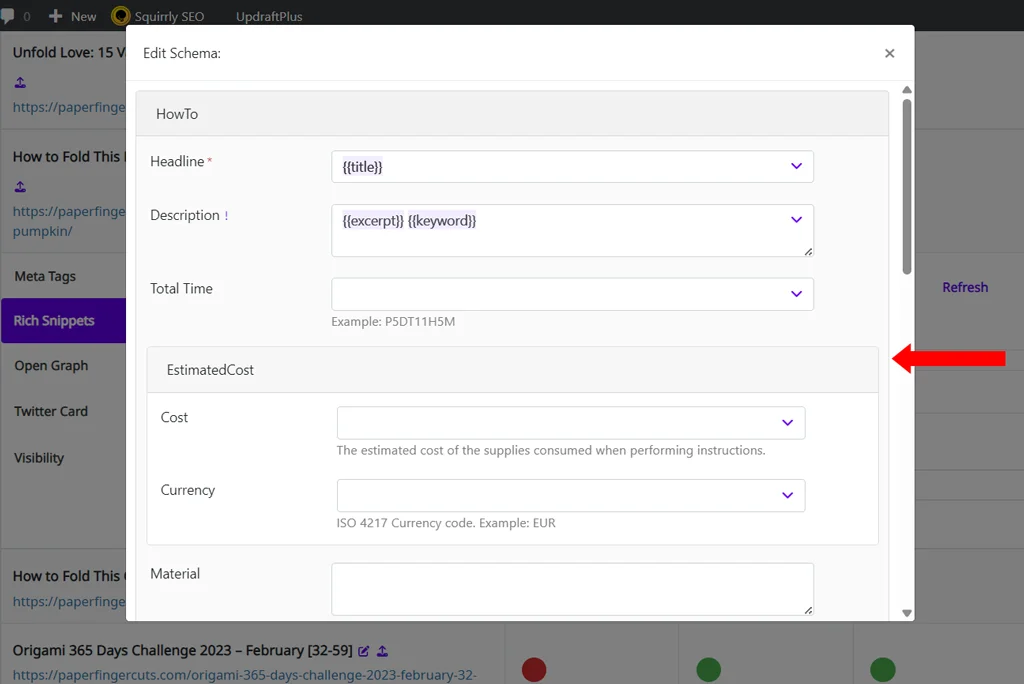
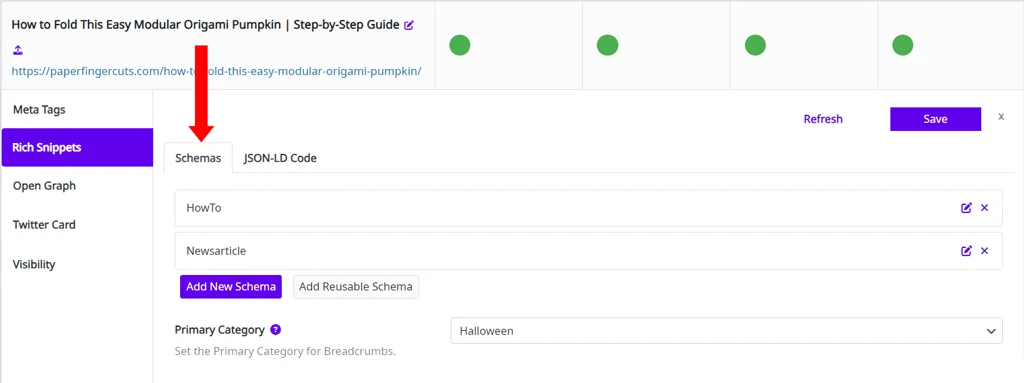
Click on Add New Schema, select the type you want to add, complete all the required details, and then click Save. Once saved, you will see all your schemas listed one after another.
Edit the Visibility in Snippet
- To reach this option, go to: Squirrly SEO > Optimize > Bulk SEO > and click on the Visibility circle
Squirrly SEO lets you customize the visibility for every single post, page, product, category, tag, custom post types, and custom taxonomies.
All you need to do is to make sure the Visibility is set correctly for the posts you want to be indexed in Google. All visibility options should be turned ON:
- Let Google Index this Page
- Send Authority to this Page
- Show it in Sitemap.xml
^^ By default, all these are turned ON.

To let a post/page to index in Google Search, switch on Let Google Index This Page. If you want to remove it from Google, switch off this option.
Squirrly SEO will add a robots meta to tell Google to index or not to index the post/page.
The robots META tag will look like this for pages you want to be indexed by Google:
<meta name="robots" content="index">
To allow a post/page to receive authority from other domains, switch on Send Authority to this page. If it’s a page that doensn’t have a lot of value, SEO-wise, (like Terms & Privacy Policy) you may want to switch off this option.
Squirrly SEO will add the appropriate robots meta (follow or nofollow) to tell Google to allow Authority to be sent to your page or not.
<meta name="robots" content="follow">
If you want to exclude a post/page from sitemap.xml, just switch off the option Show it in Sitemap.xml and the page will NOT appear in the Squirrly SEO Sitemap XML anymore.
Important!
In case you’ve made a site-level setting that lets Google know it should NOT index your site (in Settings > Reading > Search Engine Visibility > Discourage Search Engines from indexing this site), then all posts in Bulk SEO will have a red Circle for Visibility indicating that those posts are NOT visible to Google.
Discourage Search Engines from indexing this site is NOT a setting that you make using Squirrly SEO. However, because it influences your overall site visibility, it was important to highlight it in the Bulk SEO panel so that you are aware of this issue.
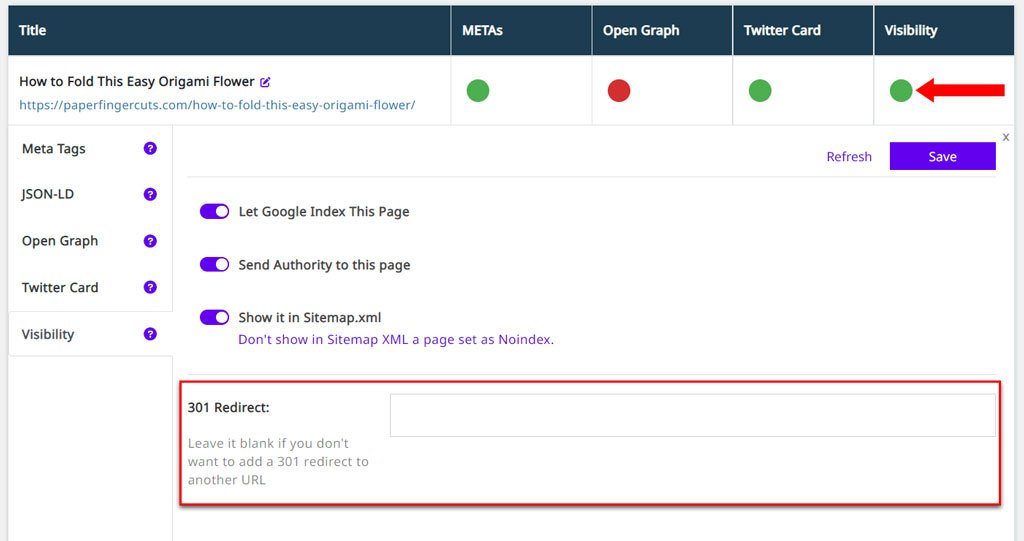
301 Move Permanently
- To reach this option, go to: Squirrly SEO > Optimize > Bulk SEO > and click on the Visibility circle
A 301 redirect is a permanent redirect that passes full link equity (ranking power) to the redirected page. It’s also a way to tell search engines that a page it is trying to reach has been permanently moved to a new location.
Because it passes full ranking power to the redirected page, a 301 redirect is recommended for SEO.
Using Squirrly, you can easily set up a 301 redirect for any URL on your site. This feature is useful for redirecting your website pages to new URLs from old URLs within the website or outside the website.
You can use it when your site or a page on your site has been moved, and you want to point the user to a new page instead.
To create a 301 Redirect, all you have to do is add a VALID URL in the dedicated section shown below.
Note that setting up a 301 redirect will cause the Element from Visibility to turn RED (this is meant to notify you of the fact that search engines will NOT index that URL on your site).
Important!
If you used the SEOPress or SEO Framework plugin to set up 301 redirects prior to using Squirrly SEO, you should know that Squirrly will import the 301 redirects as part of the Import SEO Process.