How to Incorporate Values from Custom Fields into the Custom Schema / SEO Metadata Generated by Squirrly SEO

Do you use themes or plugins, such as Advanced Custom Fields (ACF), to create custom fields for your posts, pages, or custom post types?
If yes, then you’ll be happy to know that you are now able to incorporate values associated with your custom fields into the custom Schema and SEO metadata generated by Squirrly SEO.
This is possible using field mappings.
Many plugins and themes use the wp_postmeta table to store additional information about posts.
For example, if you were using a custom fields plugin to add extra information to a post, that information would likely be stored in the wp_postmeta table with a specific meta_key and associated meta_value.
When generating the schema and SEO metadata for a page or post on your site, Squirrly SEO can retrieve the values for all custom fields (if they have an assigned value) from wp_postmeta.
Squirrly SEO will look at all the fields you’ve completed for the post ID and then grab all those fields and automatically create new Patterns for them!
This means you’ll be able to simply select a custom pattern like {{customfield(property_type)}} in your custom Schema/SEO metadata.
Squirrly will automatically replace these custom patterns with the actual values from your custom fields when the schema/SEO metadata is generated.
Squirrly SEO can only match custom fields to your custom schema/SEO metadata for URLs that already have some custom fields filled in with assigned values.
To show you an example of this feature in action, we’ll use custom fields generated using the Advanced Custom Fields (ACF) plugin.
But you need to know that Squirrly SEO can match any custom fields, including those generated by other plugins and themes you’re currently using on your site.
If the custom field is a WP hidden field and you still want to see it in the patterns list, add this line in wp-config.php file:
add_filter('sq_show_hidden_patterns', true);Creating a Custom Field using the Advanced Custom Fields Plugin
Using the Advanced Custom Fields, you can add custom metadata to your content. For example, if you own a property listing site, you can create a custom field to specify whether a property listing is available for rent or for sale.
Here’s how you would do that:
Let’s go to Advanced Custom Fields, Custom Fields → Add New section, and add Property Details as a new Field Group.
The Field Type you choose depends on the data you want to add to your custom field. In this example, we want the Property Type to be a dropdown menu with a list of options.
So we’ll choose Select as the field type, as shown in the image below.
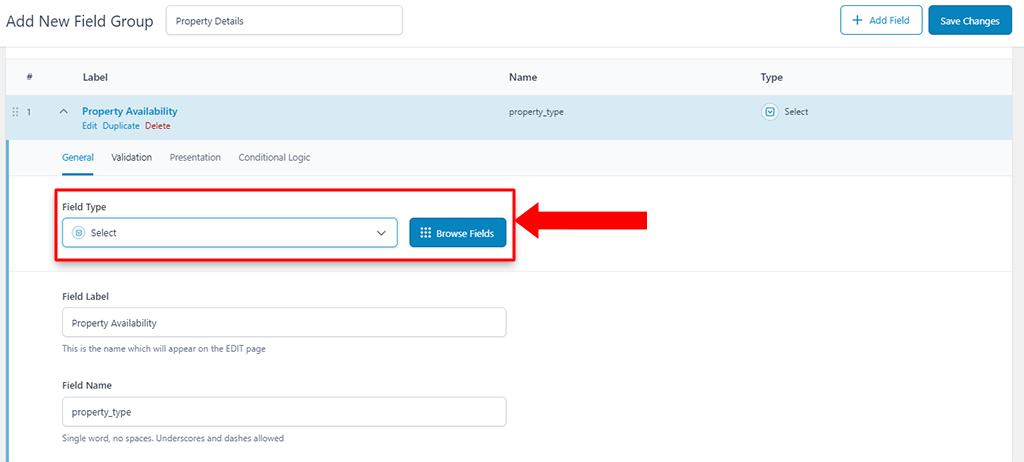
The Field Label is the name of the meta box that will appear on the EDIT page. In this example, our Field Label will be Property Availability, as shown in the screenshot below.

Next, we need to pick a Field Name.
Squirrly SEO will include the Field Name in the custom pattern it generates for your custom fields.
For this example, we’ll add property_type as the Field Name.

Note: Depending on the Field Type you’ve chosen, additional options may appear inside ACF. Please complete them as needed and continue.
Once done, scroll to the top of the page and click on the Save Changes button.
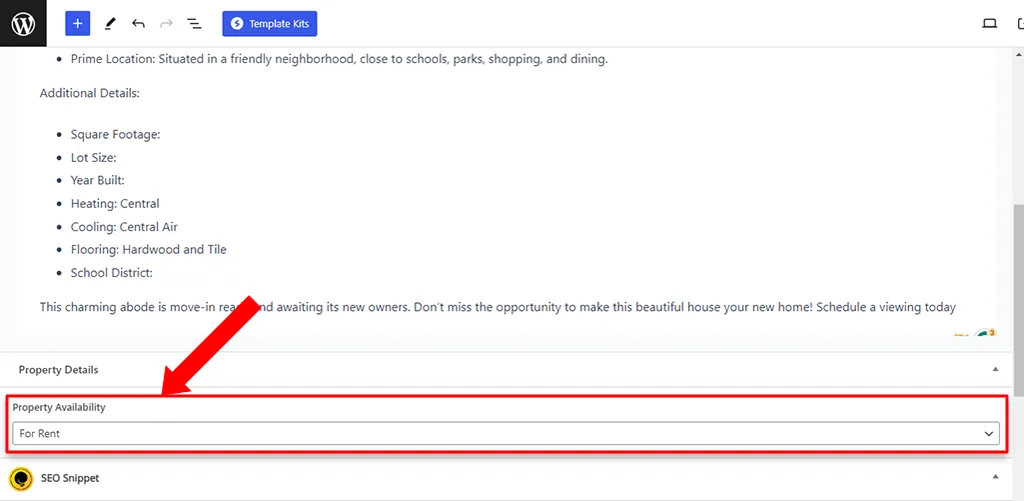
Then go to the post-editing screen where you wish to add the custom field. The Advanced Custom Fields meta box will appear towards the bottom of the editor.
Once you’ve located the newly added meta box, select or fill in the value as applicable.
For this example, we will select For Rent, as shown below.
How to Incorporate Data from Custom Fields into the SEO Metadata Generated by Squirrly SEO
Navigate to Squirrly’s SEO Snippet and click on Meta Tags > Edit Metas, as shown below.

In Squirrly’s SEO Snippet Editor, go to the meta that you want to customize using data from your custom fields.
For this example, let’s say we want to add the data from our property_type custom field in the meta title generated by Squirrly SEO.
For this, all we have to do is go to Title and select the corresponding pattern that Squirrly SEO automatically generated from the list of available Patterns.
Since our Field Name is propety_type, the pattern we’ll select is: {{customfield(property_type)}}

Once done, click on Save to save your changes.
Squirrly will automatically add the values from your custom field when generating the meta title.

The same workflow can be used to automatically incorporate values from your custom fields into your meta description generated by Squirrly SEO.
If you don’t want to use the Squirrly SEO Snippet to customize your METAs, you can also use Squirrly’s BULK SEO feature for this.
How to Incorporate Data from Custom Fields into the Custom Schema Generated by Squirrly SEO
You can seamlessly incorporate data from your custom fields into the custom Schema generated by Squirrly SEO, without having to add any new code to your website.
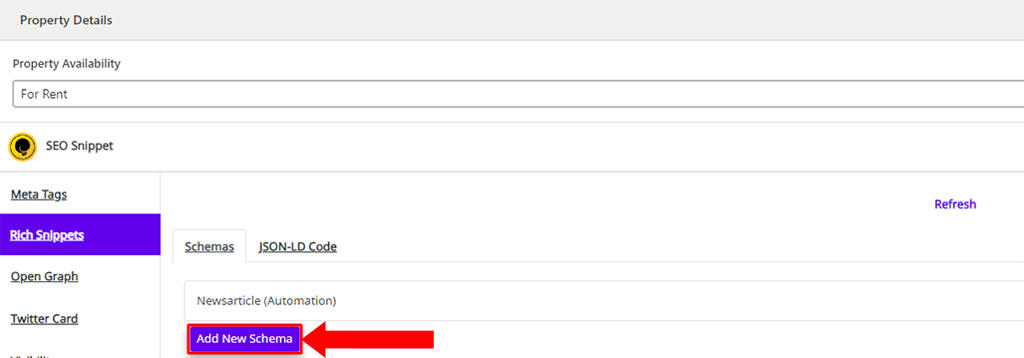
To get started, go to Rich Snippets and select the Schema Type you want Squirrly to generate for your post.
Let’s say we want to create a Video schema for the property listing post we used as an example.
With Squirrly SEO, you can do that with just a few clicks, by following the steps shown below.

To incorporate the values from a custom field into your schema, simply select the corresponding pattern that Squirrly SEO generated from the drop-down shown below.
For this example, the corresponding pattern is {{customfield(property_type)}}.

Squirrly will automatically replace these custom patterns with the actual values from your custom fields when the schema is generated.
NOTES!
The custom pattern {{customfield(field_name)}} will retrieve the values as they are stored in the wp_postmeta database, where meta_key = field_name and meta_value= “value”
However, Squirrly SEO can also retrieve data if there’s an array of values in wp_postmeta. The custom pattern {{customfields(field_name|array_key)}} will retrieve the values as they are stored in the wp_postmeta database, where meta_key = field_name and meta_value = array (“array_key” => “value”).


0 Comments